How to remove "Powered by" text in ChatMaxima Live Chat Widget ?

Step 1: Access Your ChatMaxima Dashboard
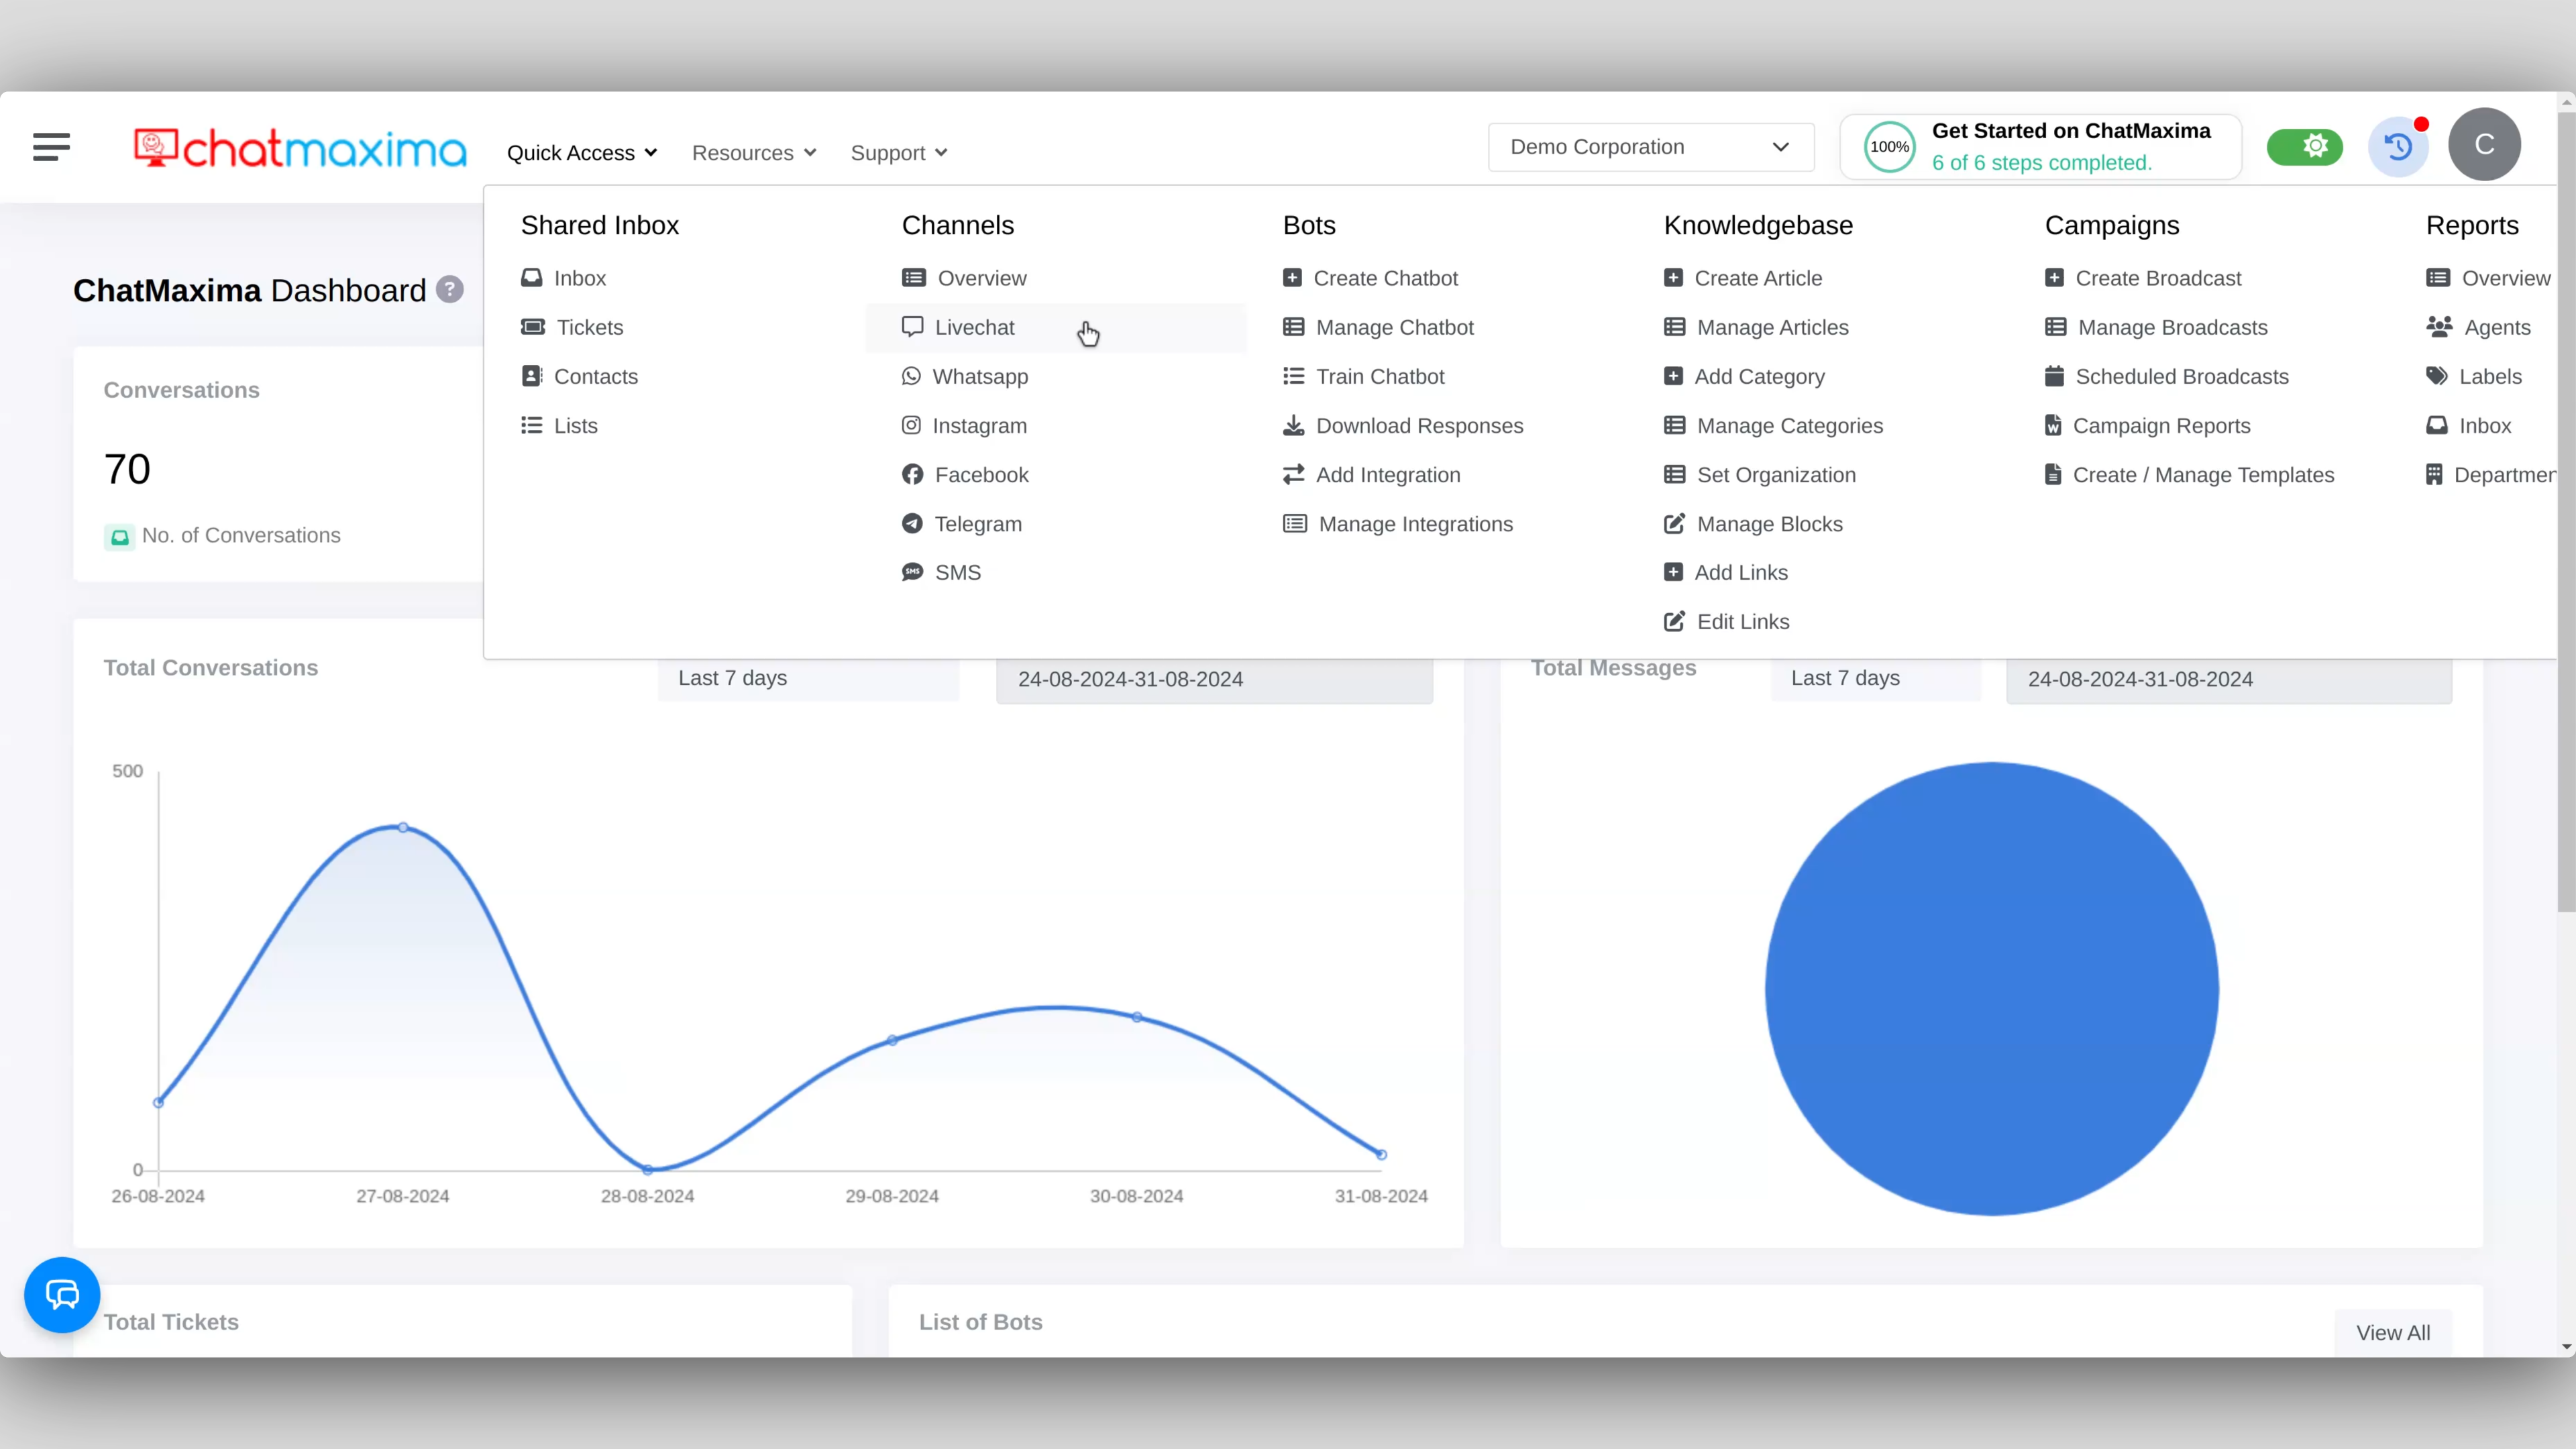
Log in to ChatMaxima: Begin by logging into your ChatMaxima account.
Navigate to the Live Chat Section: From the dashboard, go to the Live Chat section.
Step 2: Create or Select a Live Chat
If you don't have a live chat, create one. If you want to make changes to an existing select the relevant live chat.
Step 3: Go to Manage LiveChat Integration
After setting up or selecting your live chat, head to the Manage LiveChat Integration section.
Here, you'll find a list of the live chats you've created.
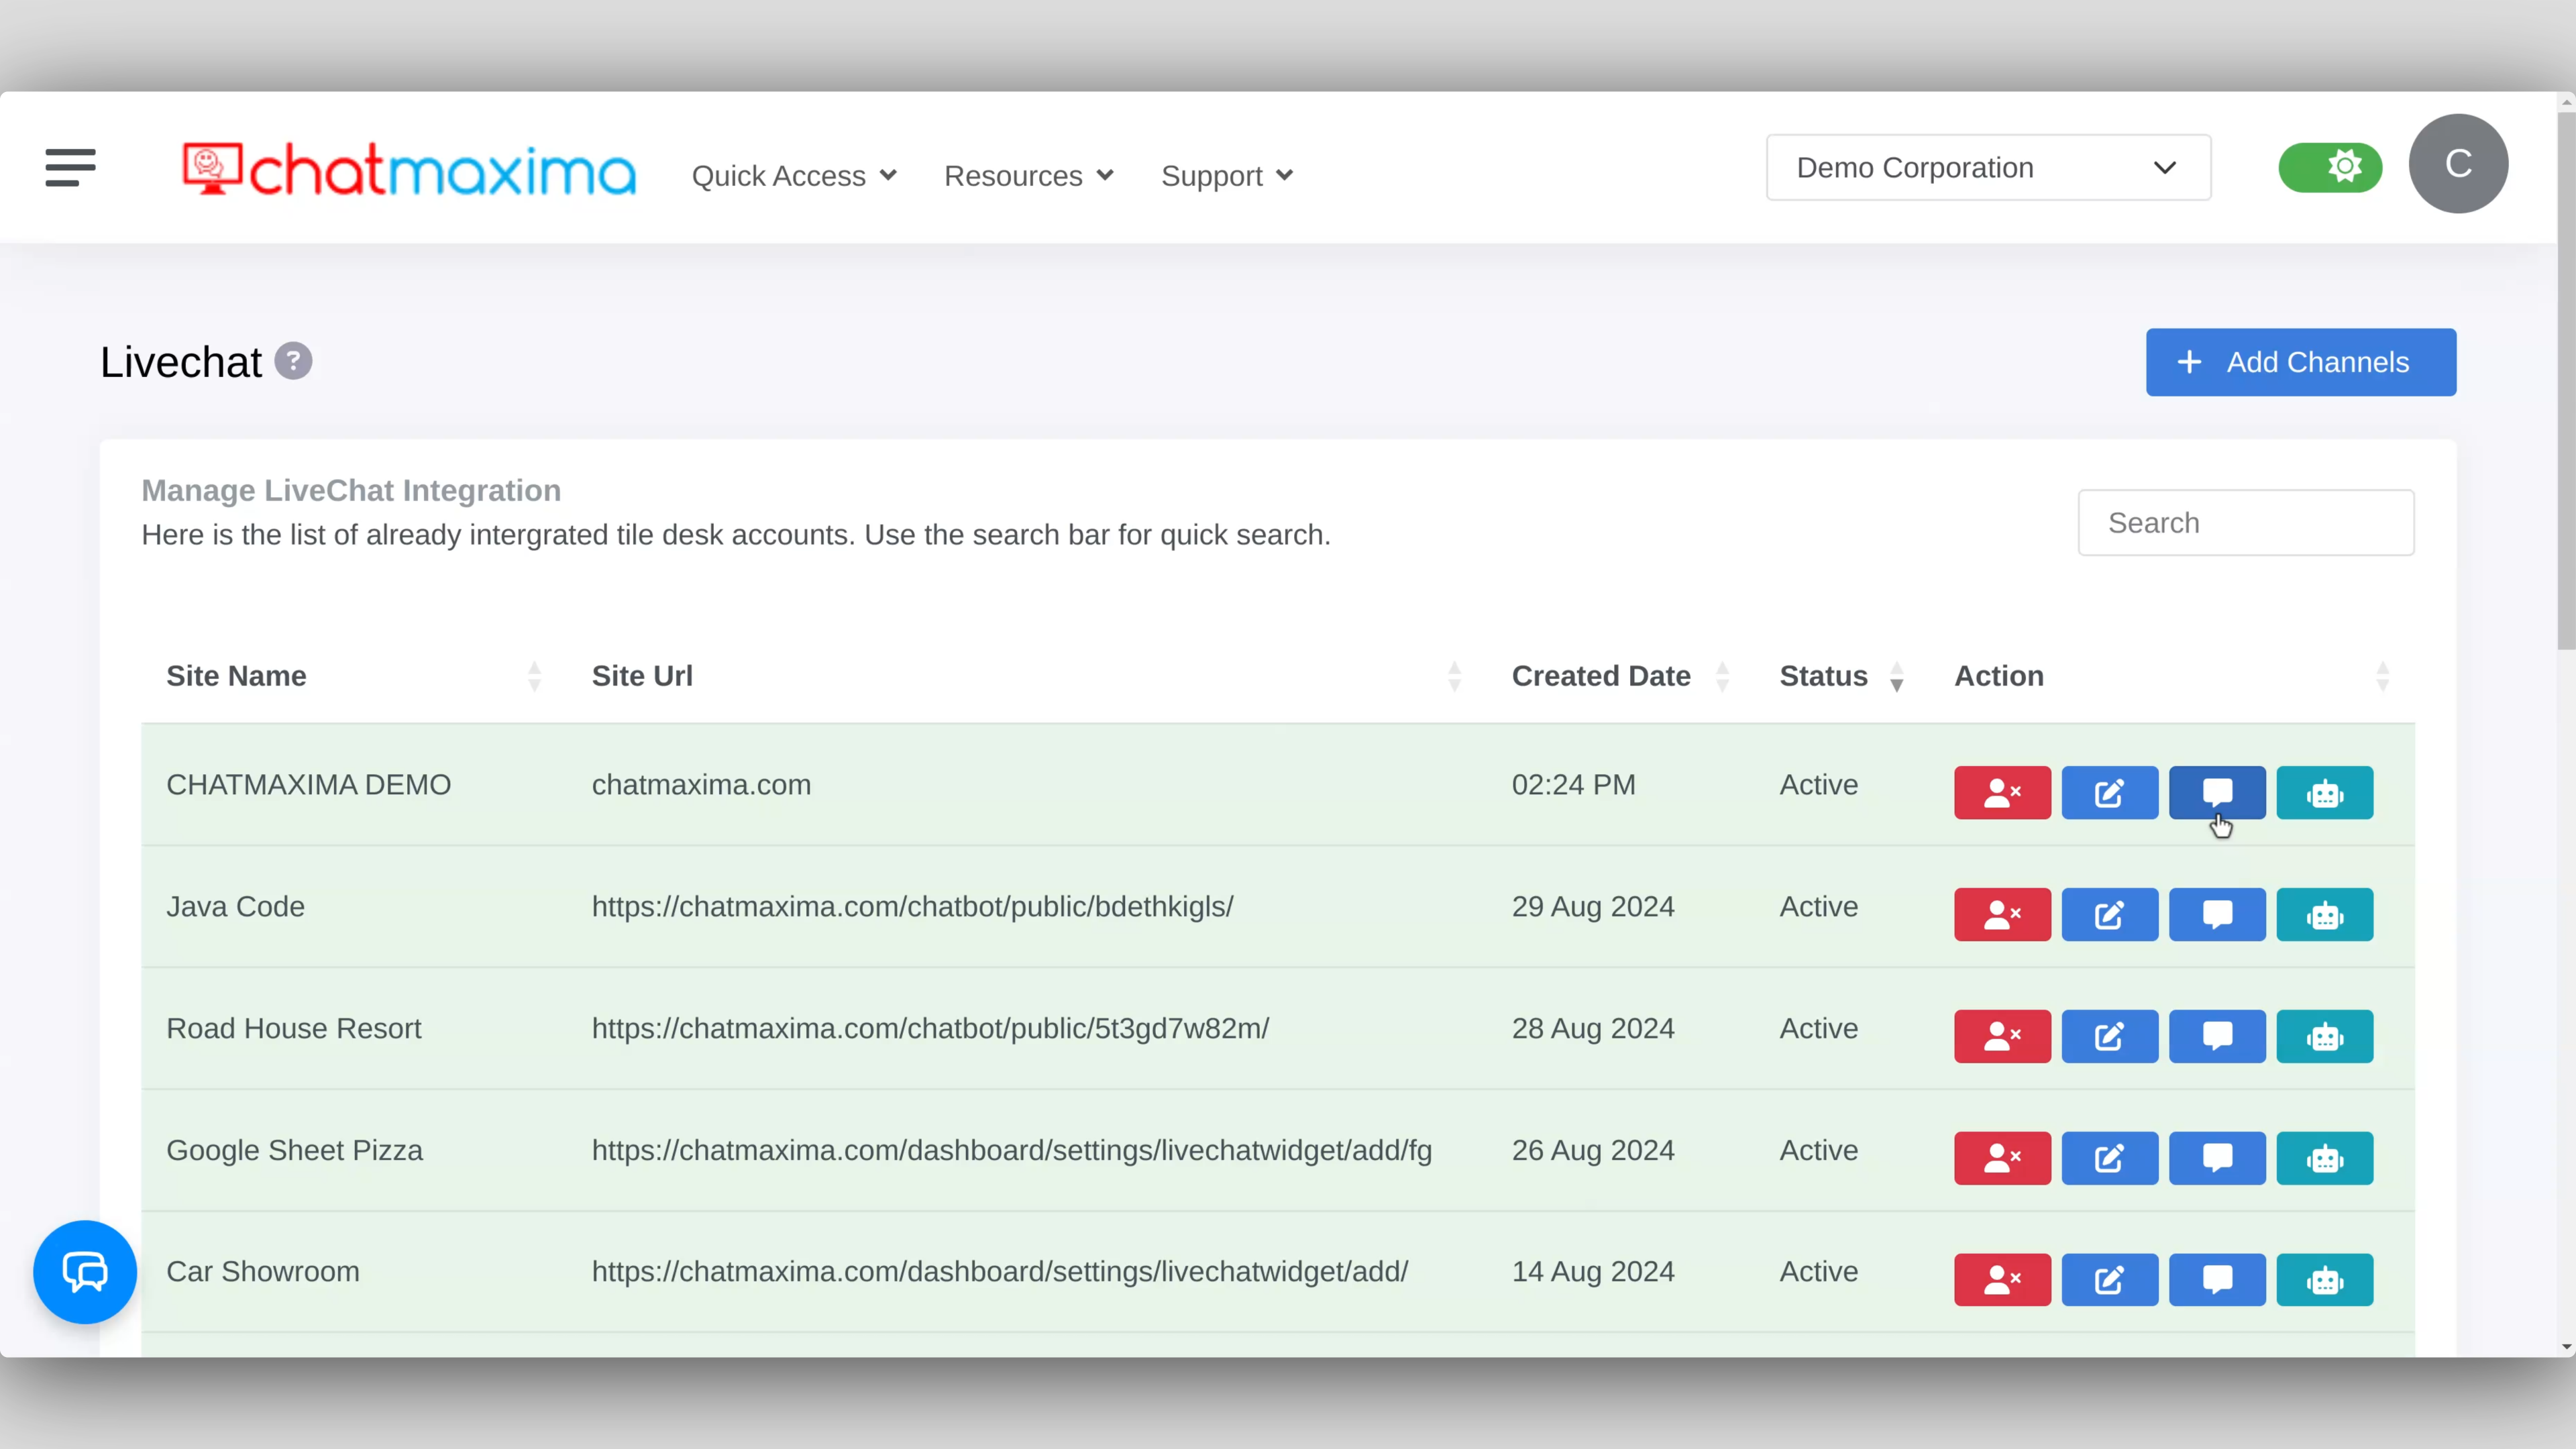
Step 4: Access Chat Widget Settings
In the Action column, find the chat icon located next to the edit icon.
Click on the chat icon to open the chat widget settings.
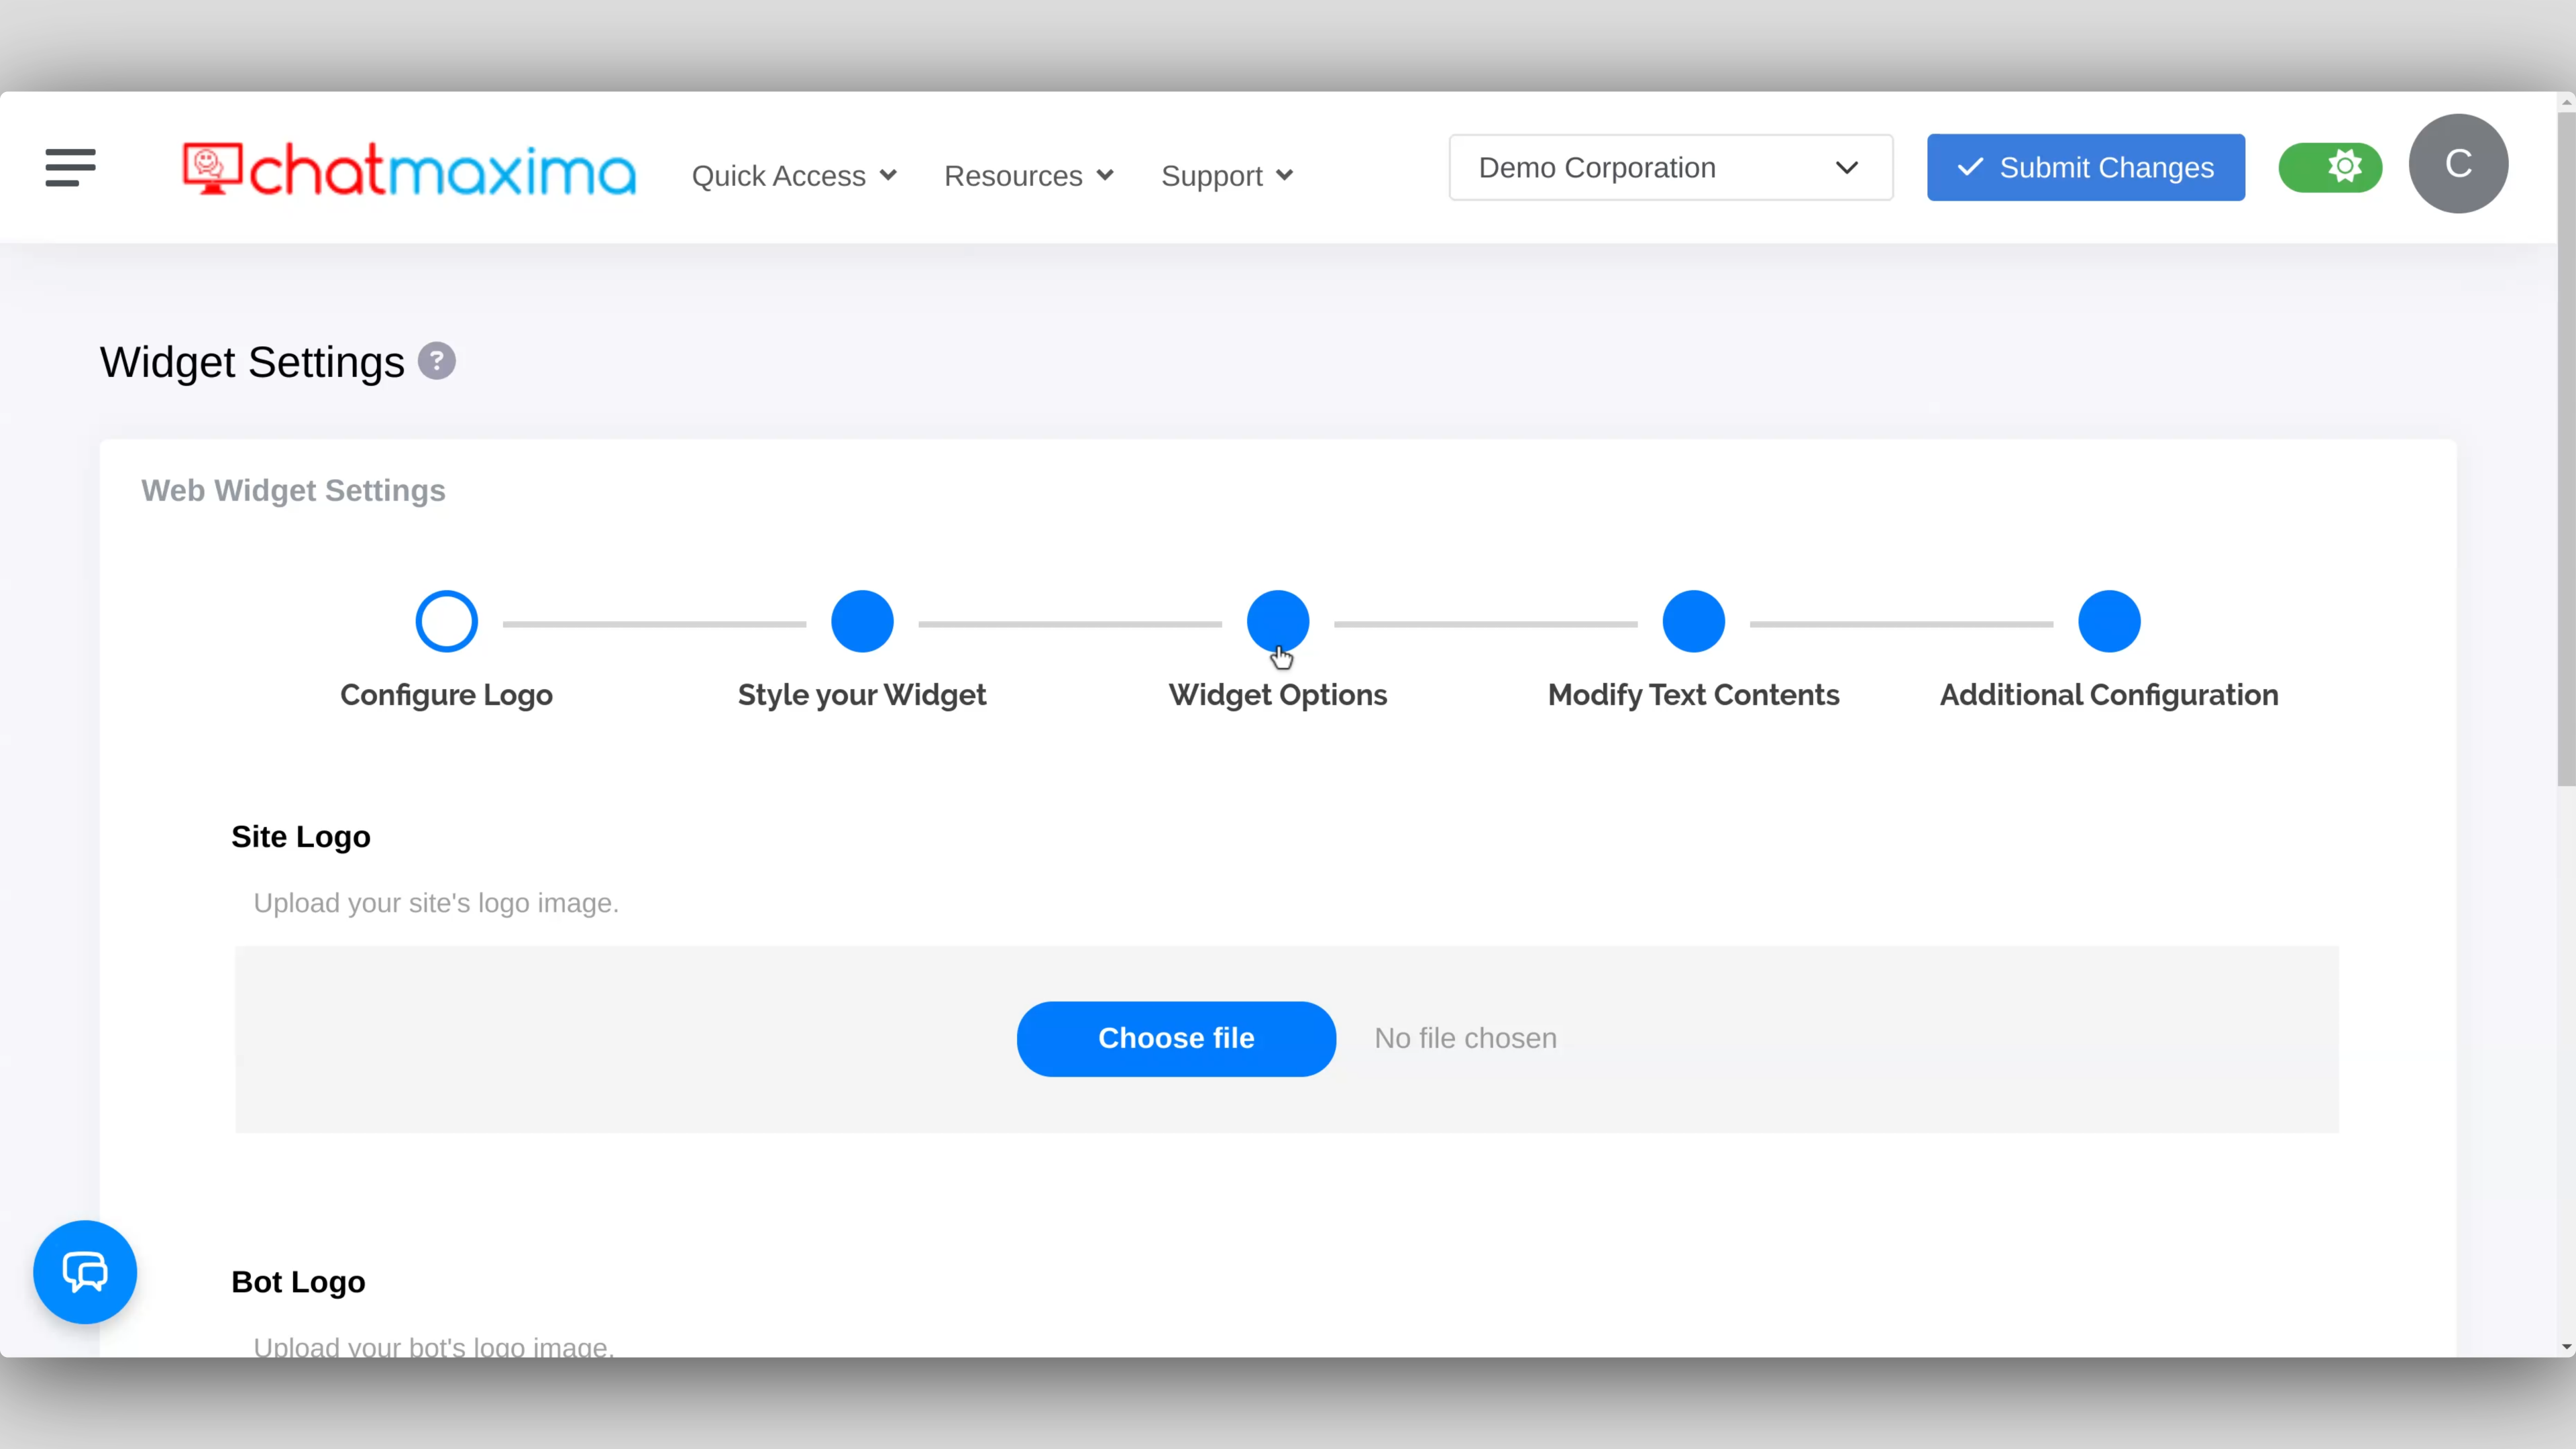
Step 5: Open Widget Options
Once inside the widget settings, you'll see five options.
Click on Widget Options.
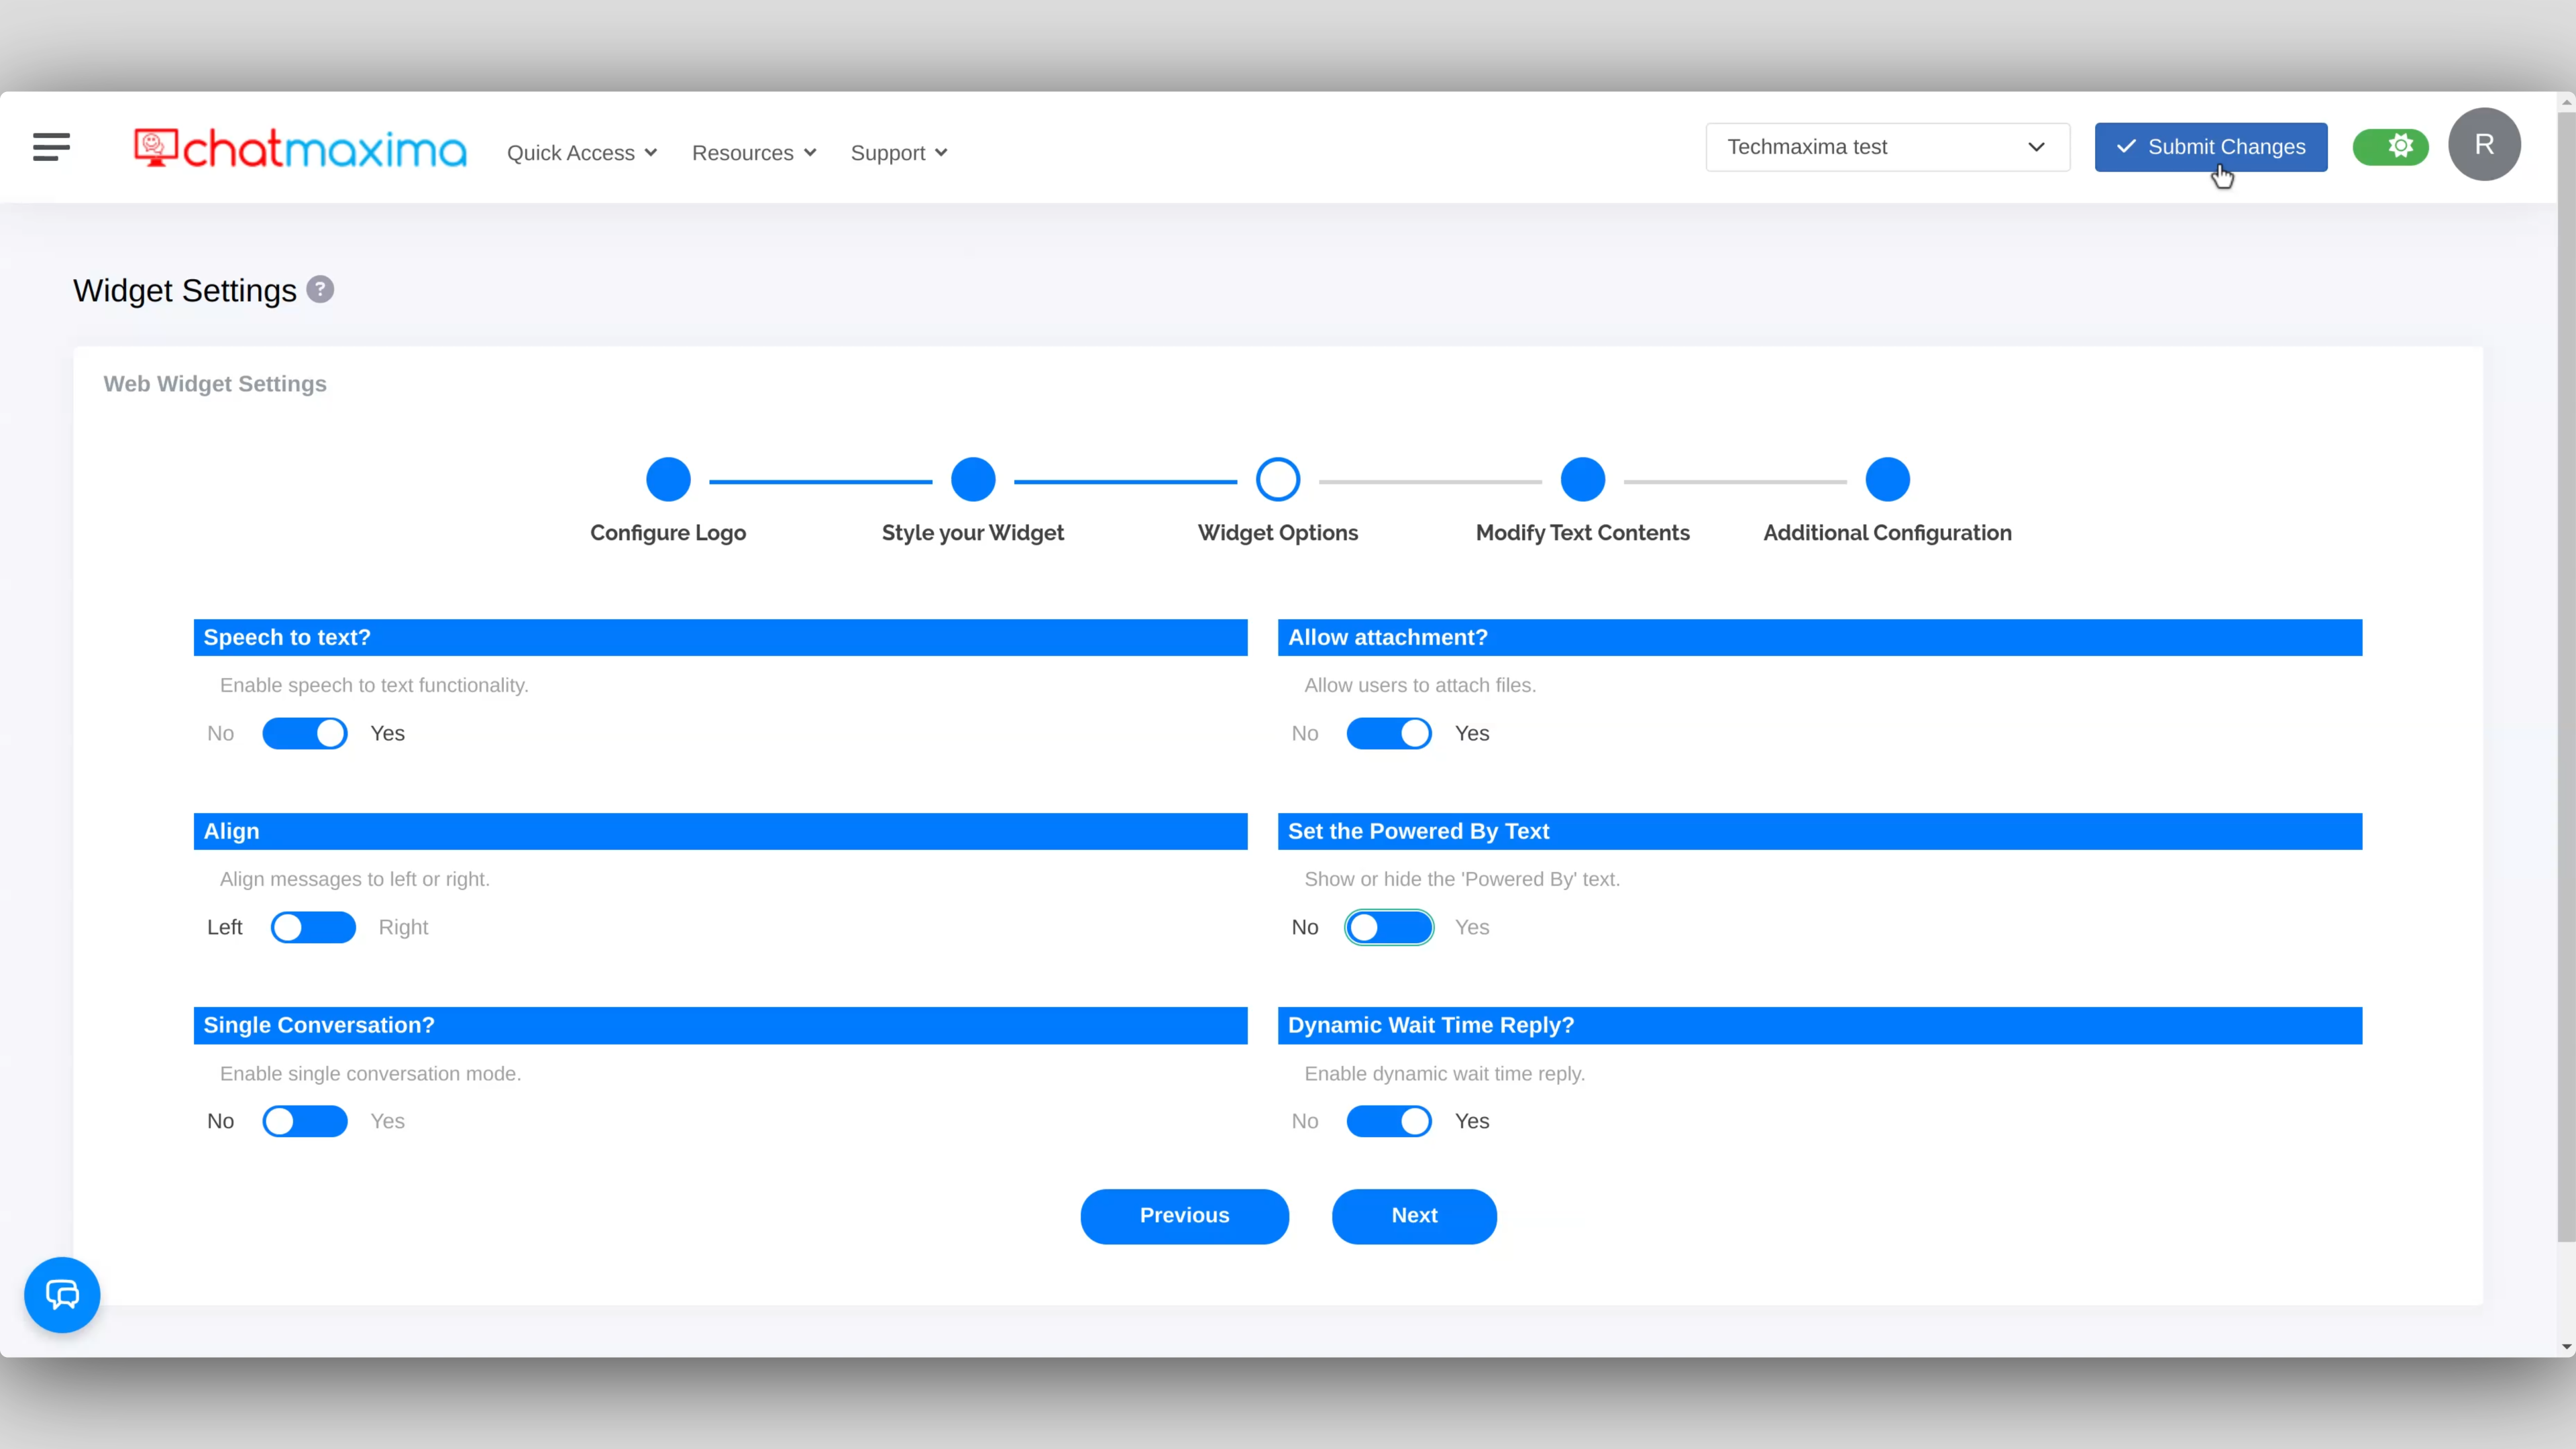
Step 6: Disable the "Powered by" Text
In Widget Options, locate the setting labeled "Set the Powered By Text".
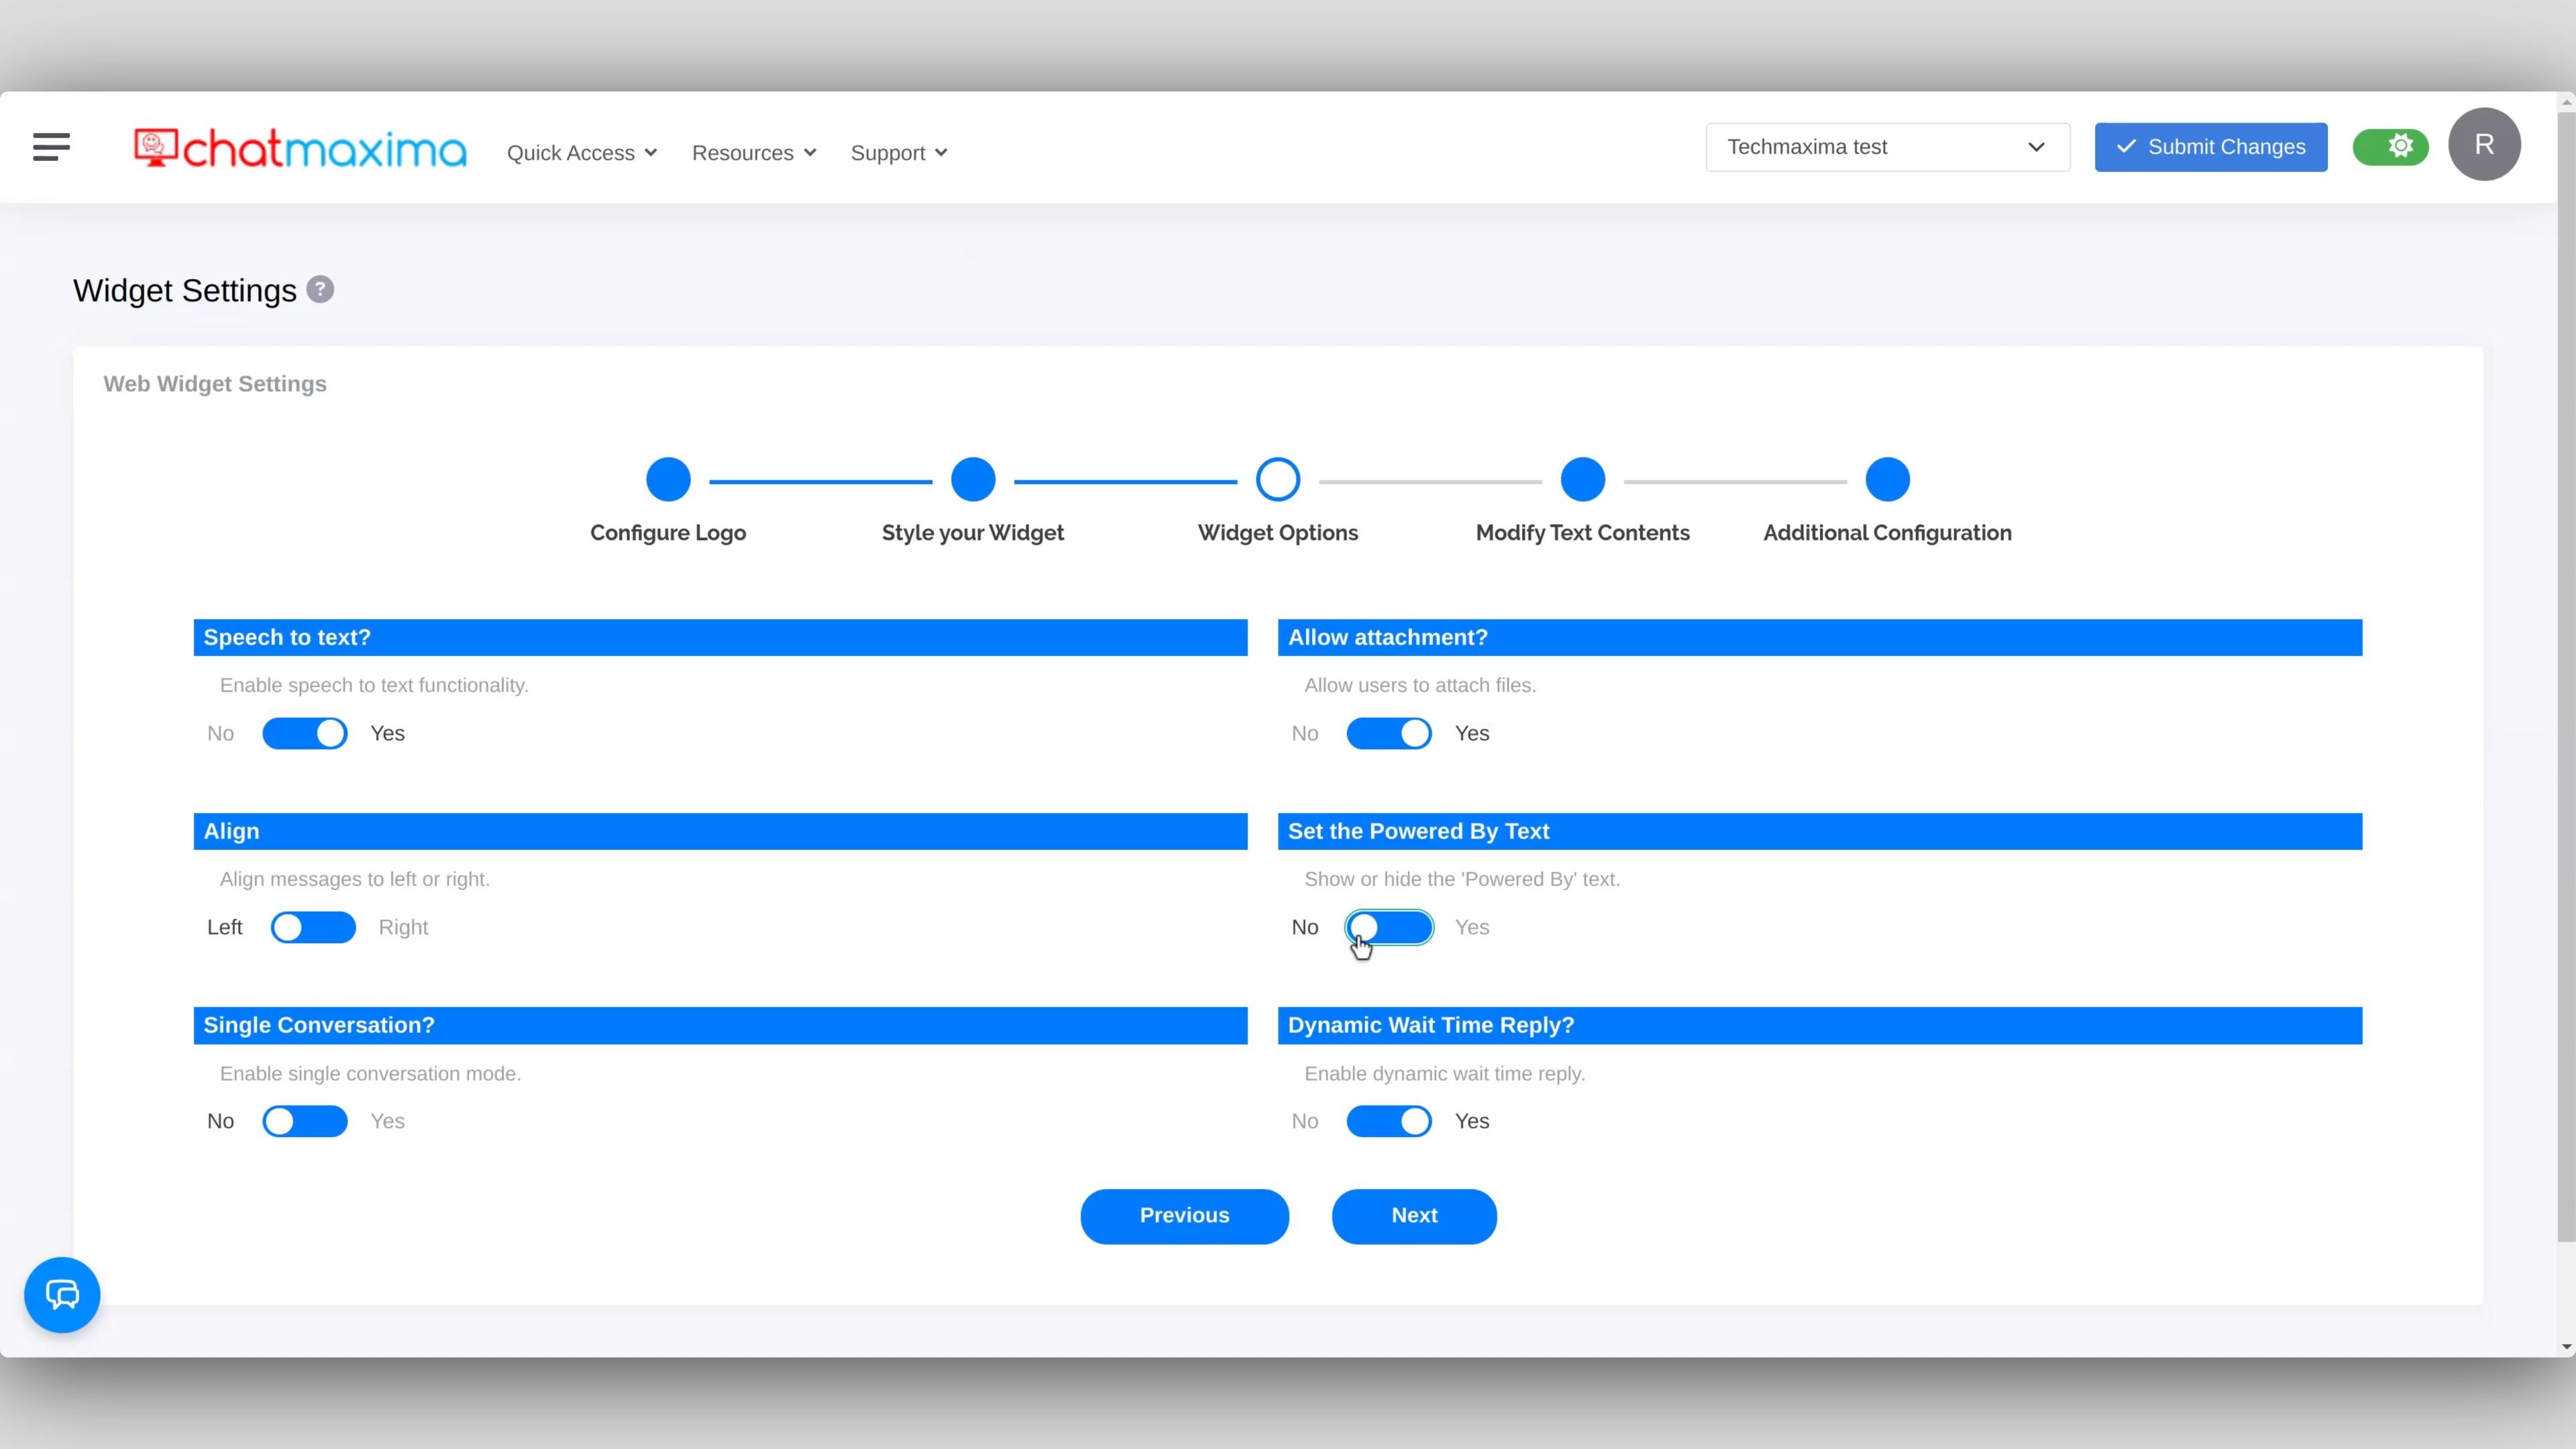
Toggle the switch to No to remove the "Powered by" text.
Step 7: Save Your Changes
After adjusting the setting, click Submit Changes to save your updates. By following these steps, you'll successfully remove the "Powered by" text, ensuring that your ChatMaxima Live Chat Widget is fully aligned with your brand's identity.