How to Customize Widget Settings in Live Chat?

Customizing your Live Chat widget settings allows you to tailor the appearance and functionality of your chat experience to match your brand and meet your specific needs. Follow these simple steps to personalize your widget settings in ChatMaxima and enhance user engagement.
Step 1: Signup for a ChatMaxima Account / Login with your Existing Credentials
To get started, Sign up for a ChatMaxima account and explore the platform with our free subscription. If you're already a user, Log in using your existing credentials. This step unlocks the potential for seamless communication and engagement at no cost with our complimentary subscription.

Step 2: Accessing ChatMaxima Dashboard
After login, the ChatMaxima Dashboard opens, providing a central hub for your activities.

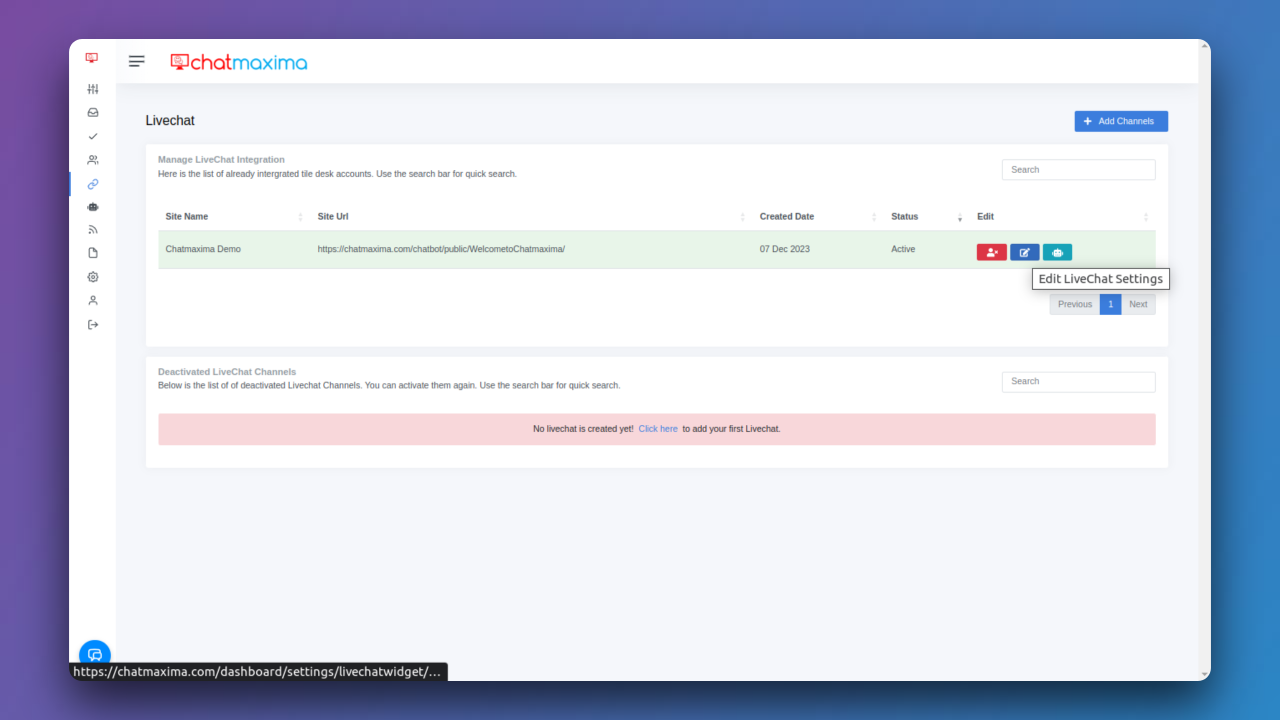
Step 3: Accessing Livechat in ChatMaxima
Upon login, you will be redirected to ChatMaxima’s Dashboard. Goto the sidebar and click on "Channels" and then select "Livechat."

Step 4: Create and Edit Your Livechat Widget
- Create a Free Livechat Widget for your website.
- After creating the Livechat, click the "Edit" button.
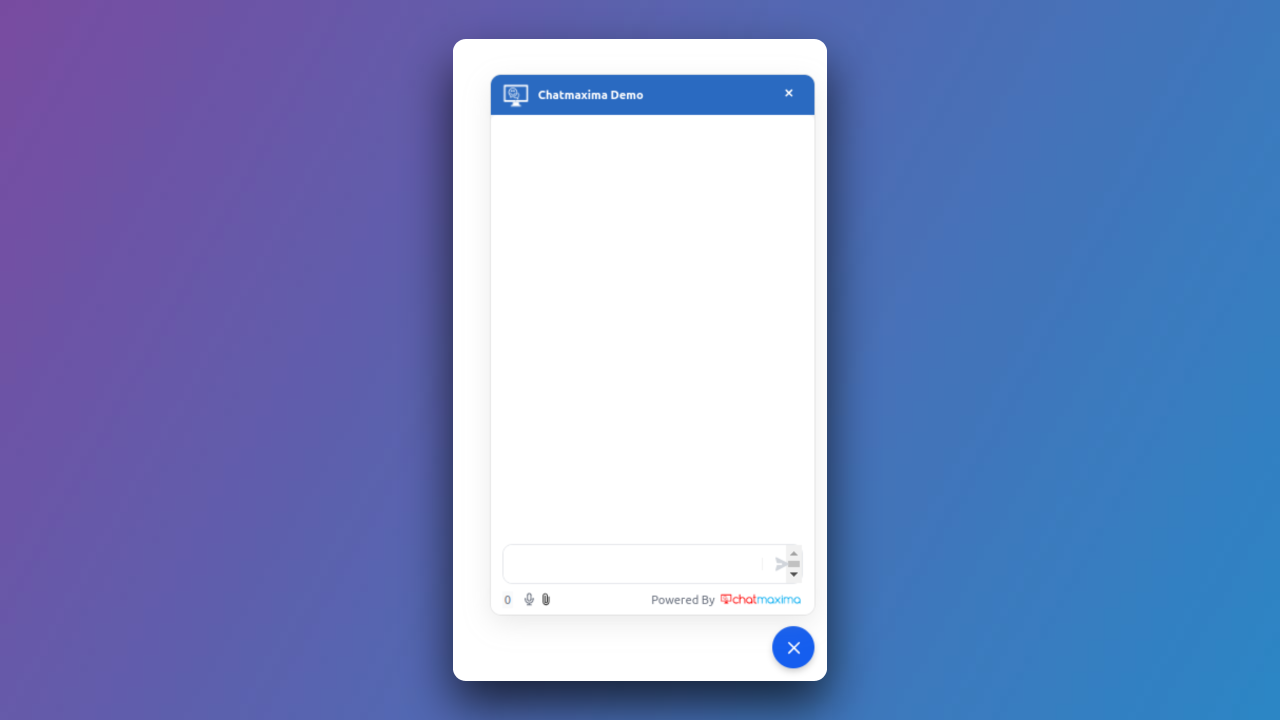
Step 5: LiveChat Widget Integration Settings
Navigate to "Widget Settings" on the top right corner to customize your widget:


a) Site Logo
Displayed on the Welcome page and Conversation page near the Bot name.
Upload your site logo, which will be prominently featured on the Welcome page and alongside the Bot's name during conversations.
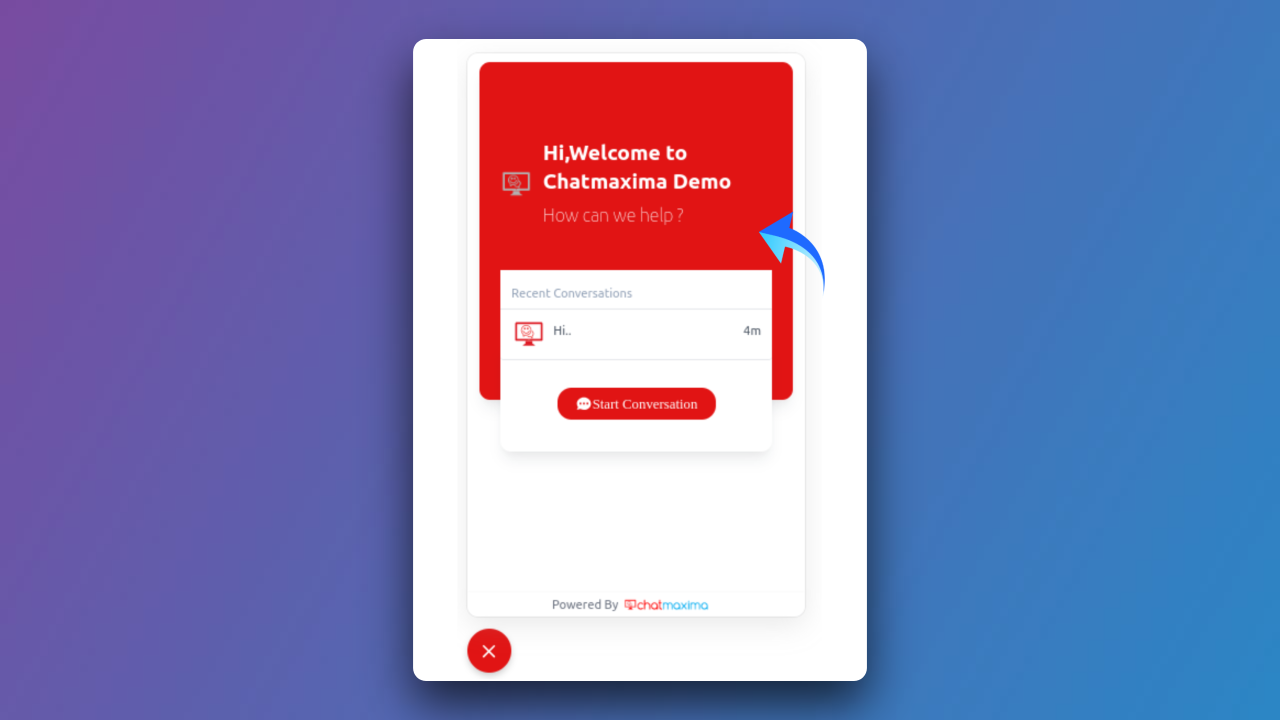
Welcome page Site Logo:
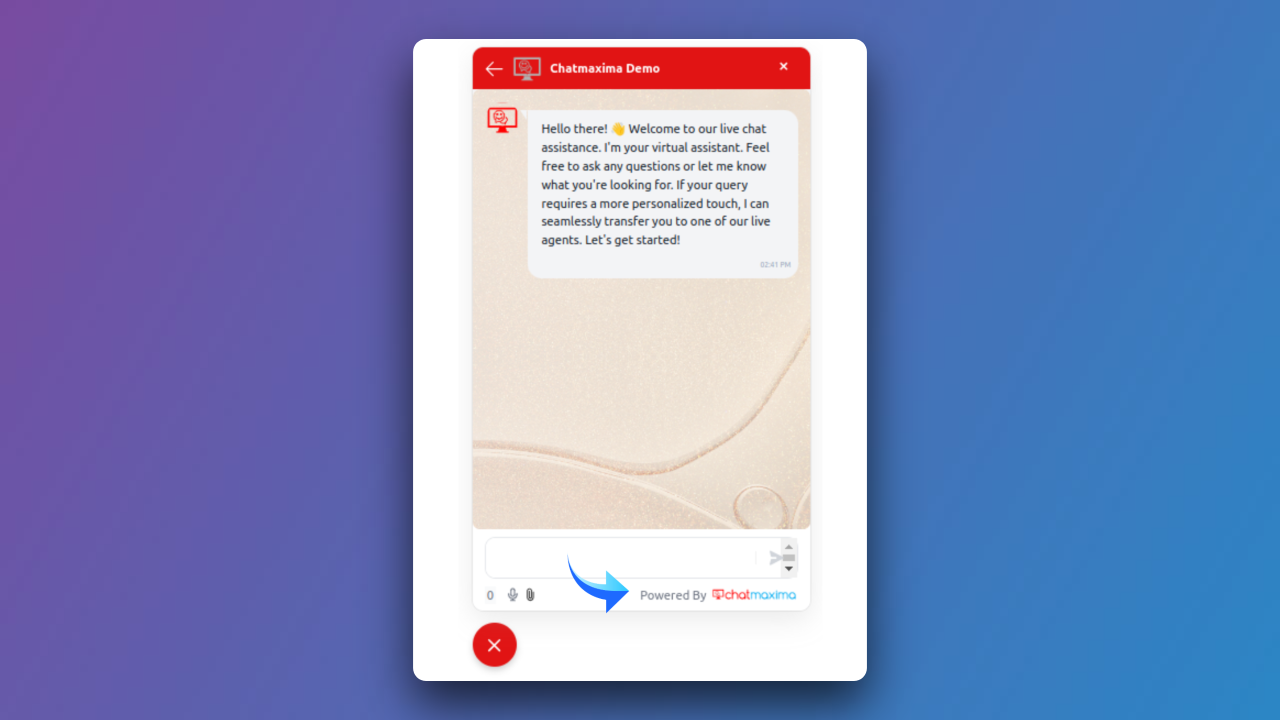
Conversation page Site Logo:
b) Bot Logo
Displayed alongside messages.
Upload your Bot's logo to appear beside each message, adding a personalized touch to the conversation.
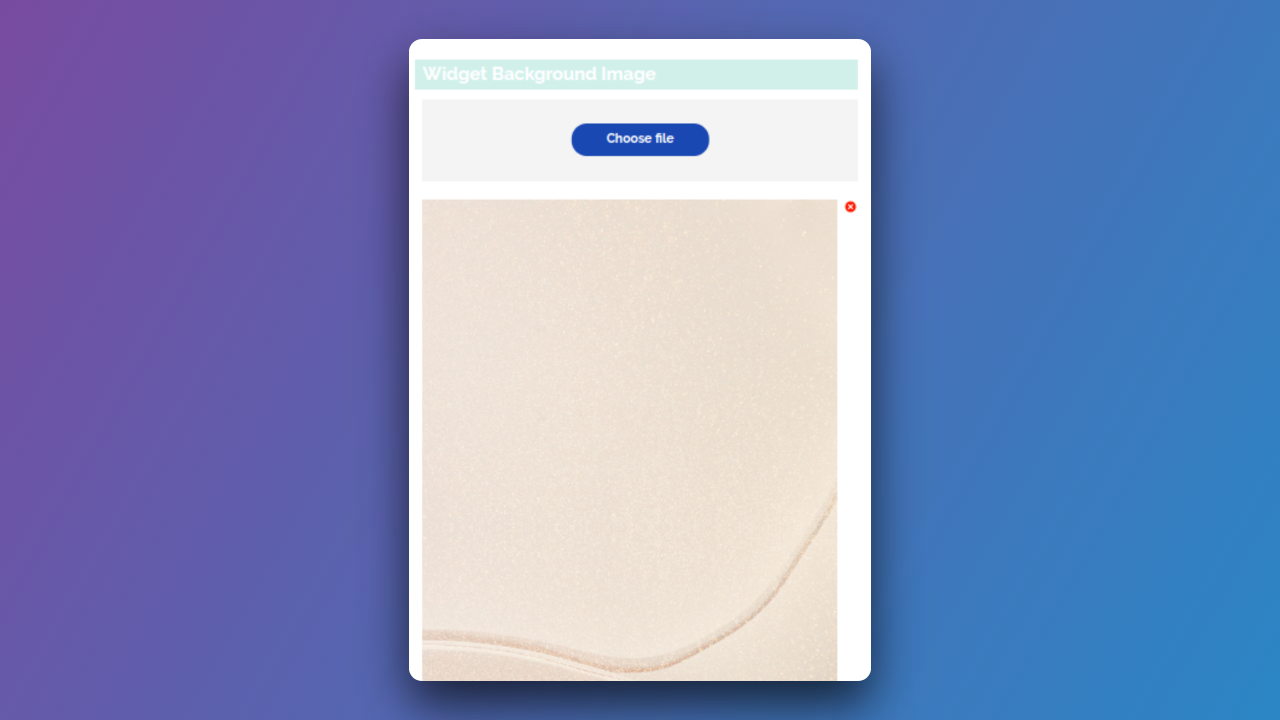
c) Widget Background Image
Customize the background image.
Enhance the visual appeal of your chat widget by selecting a background image that aligns with your brand or theme.

d) Select Theme Color
Set the theme color for the widget.
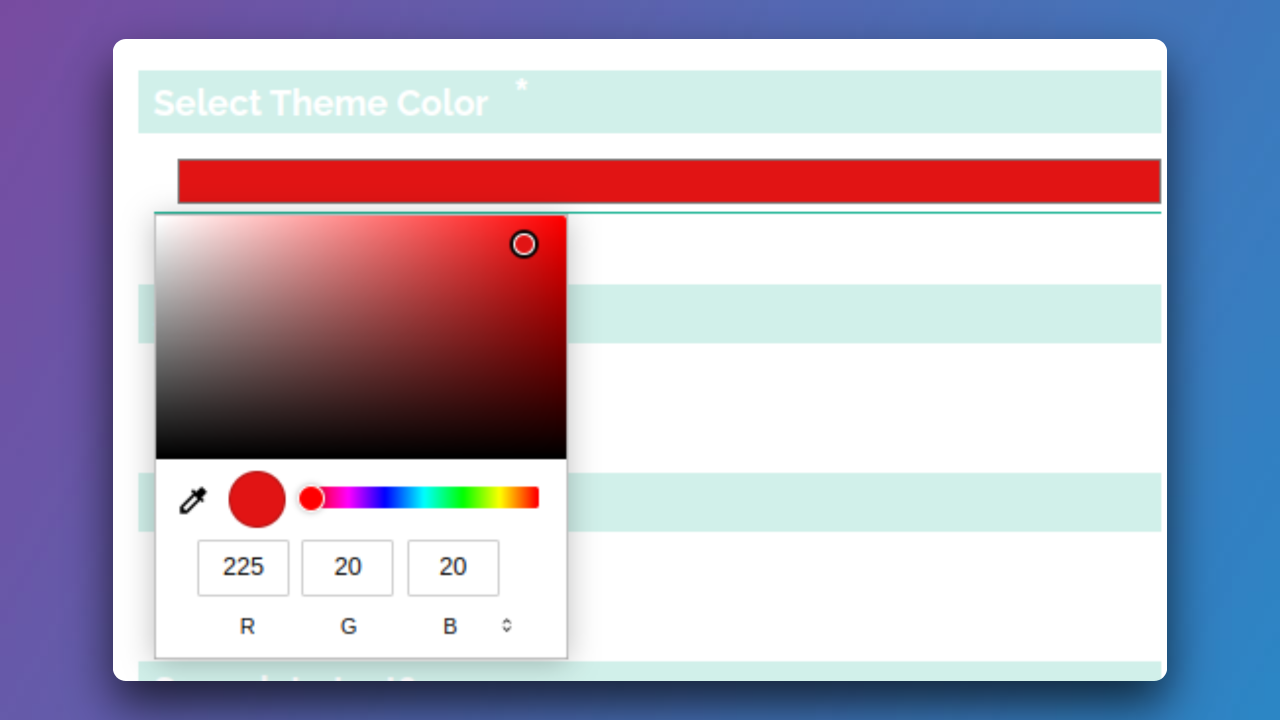
Choose a theme color that complements your branding, giving your widget a cohesive and professional appearance.

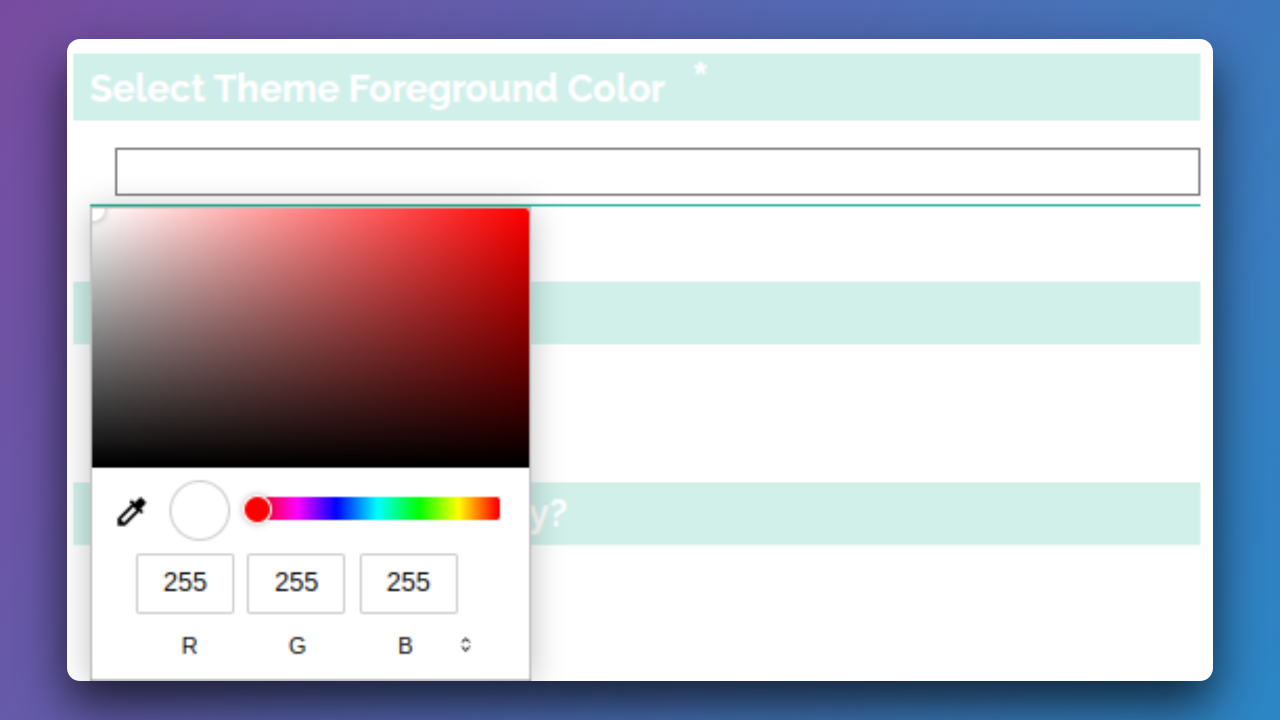
e) Select Theme Foreground Color
Define the font color for the widget.
Customize the font color to ensure readability and visual harmony with your selected theme.
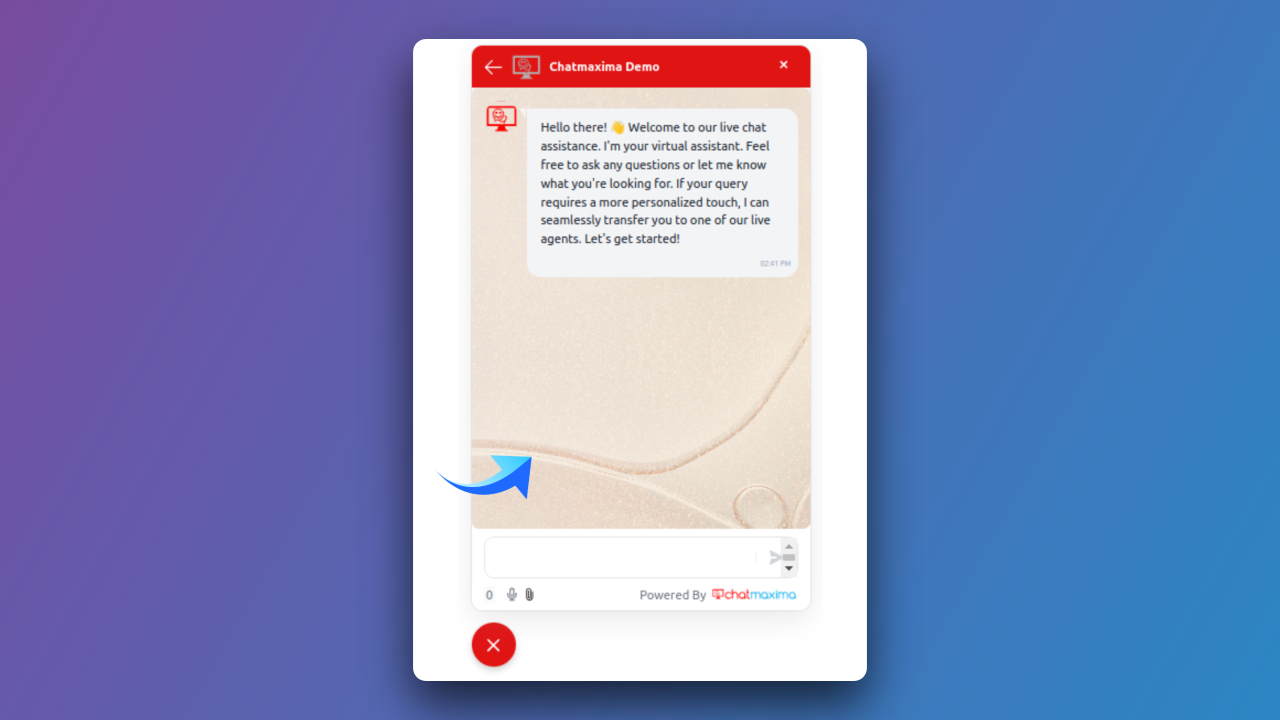
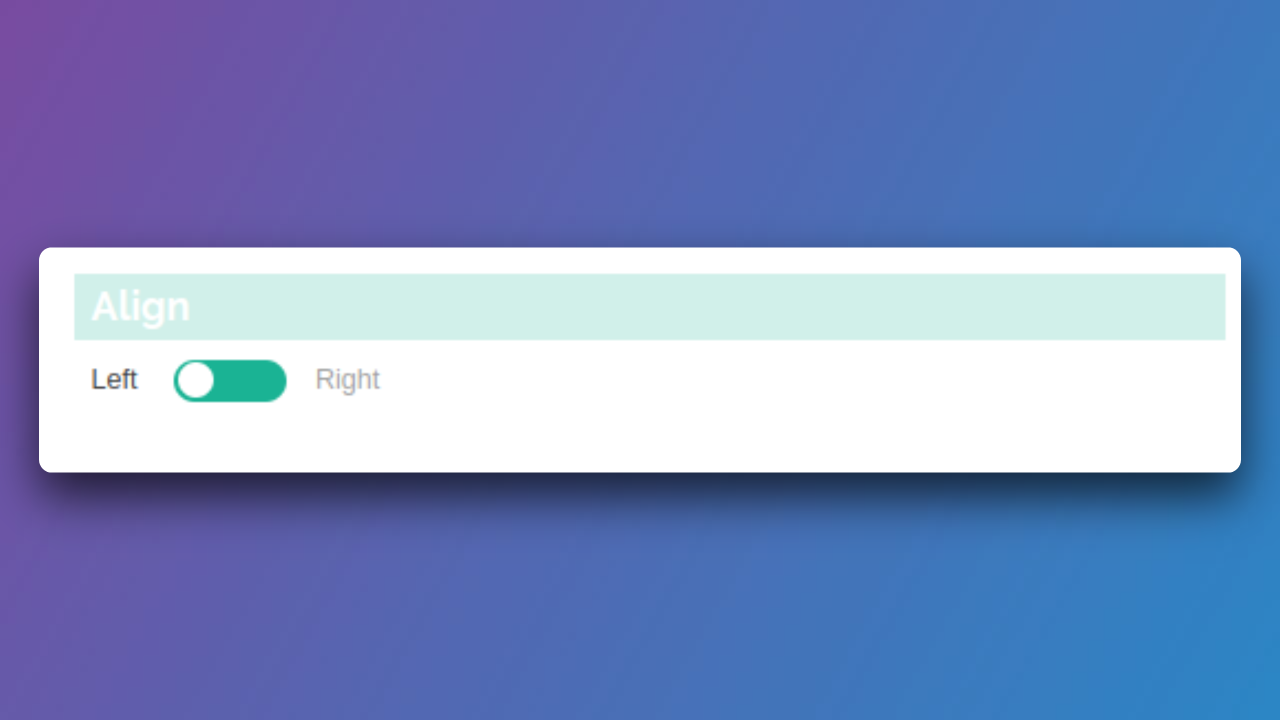
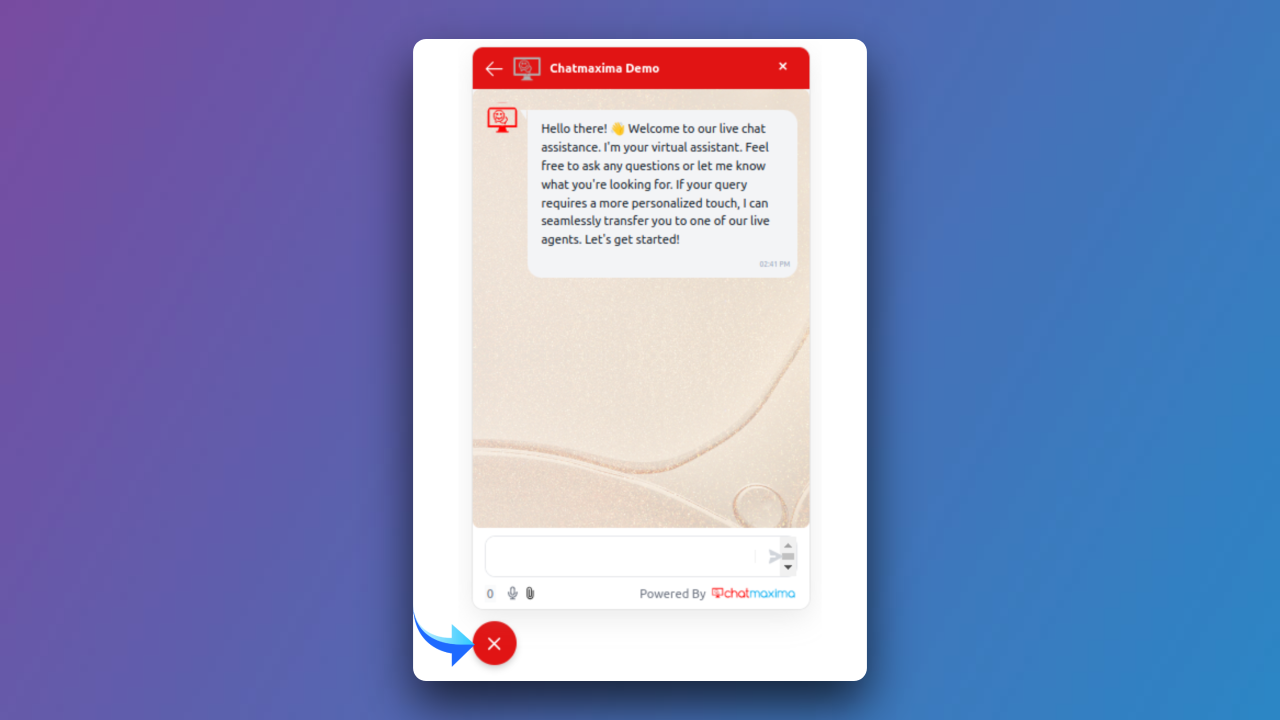
f) Align
Choose left/right to embed the icon.
Determine the placement of the widget icon by selecting either the left or right alignment, depending on your design preferences.
g) Set the Powered By Text
Enable/disable the "Powered By" text.
Toggle the option to display or hide the "Powered By" text, providing flexibility in customizing your widget's attribution.

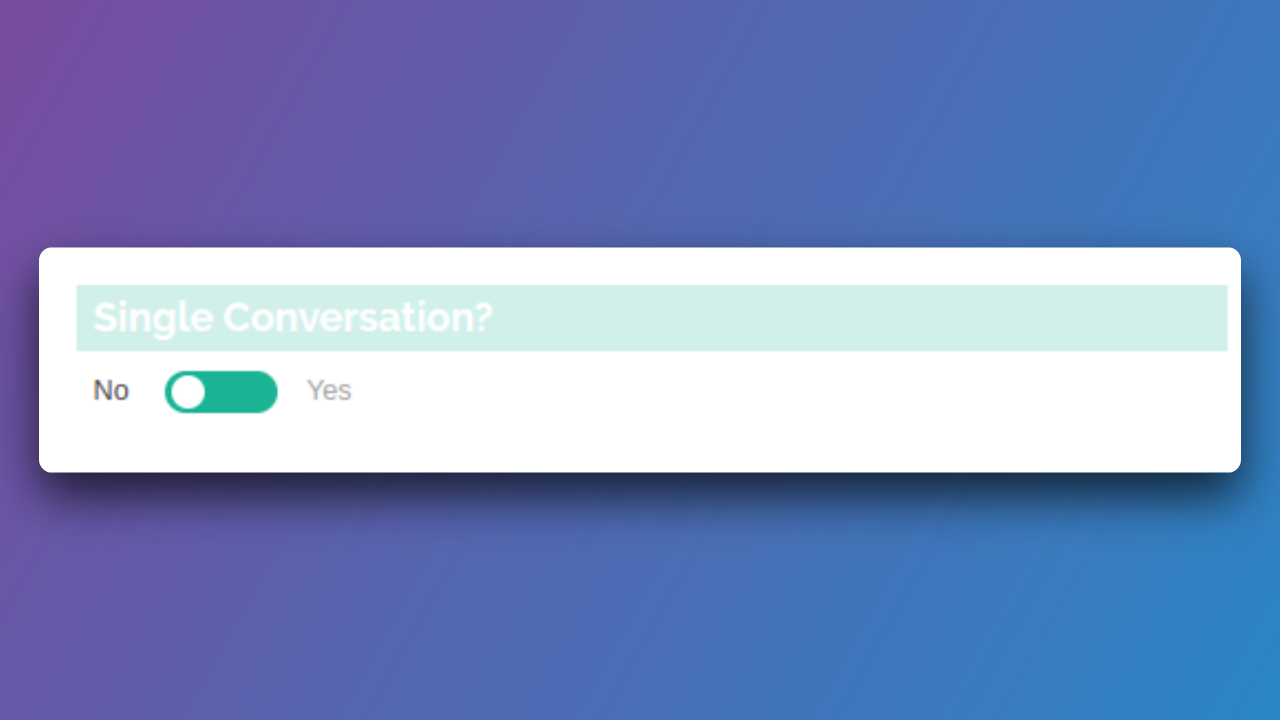
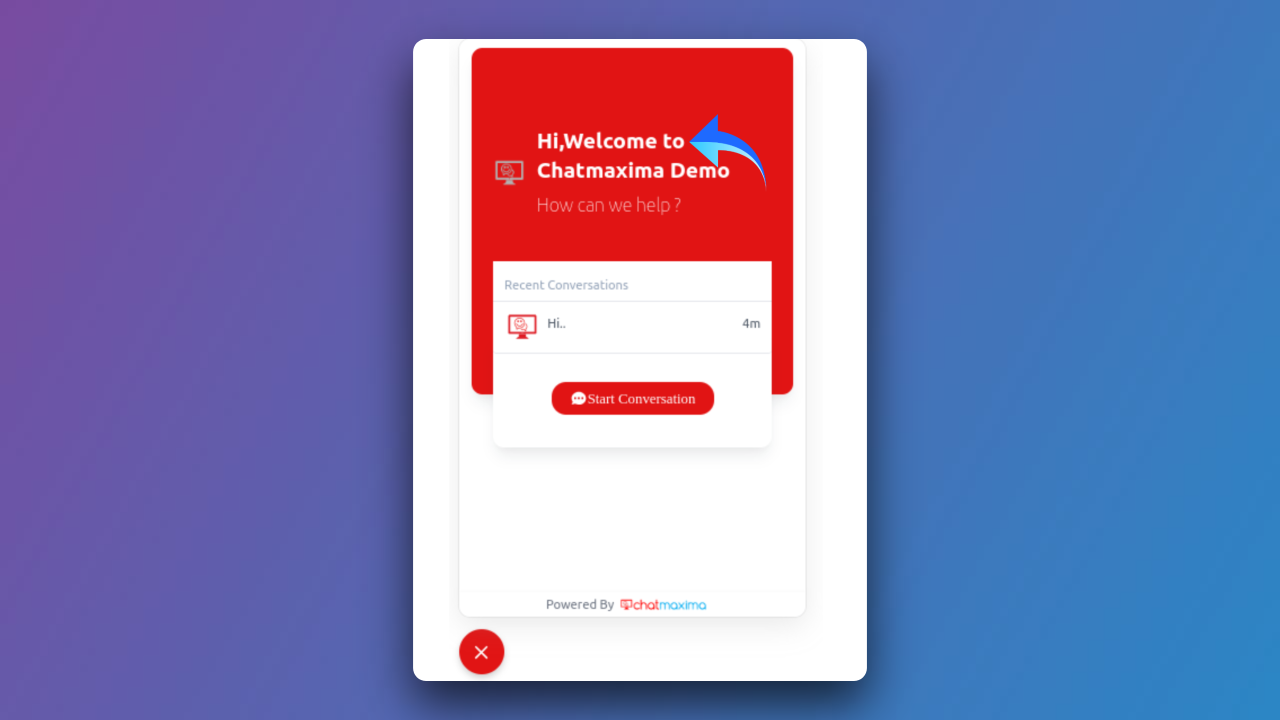
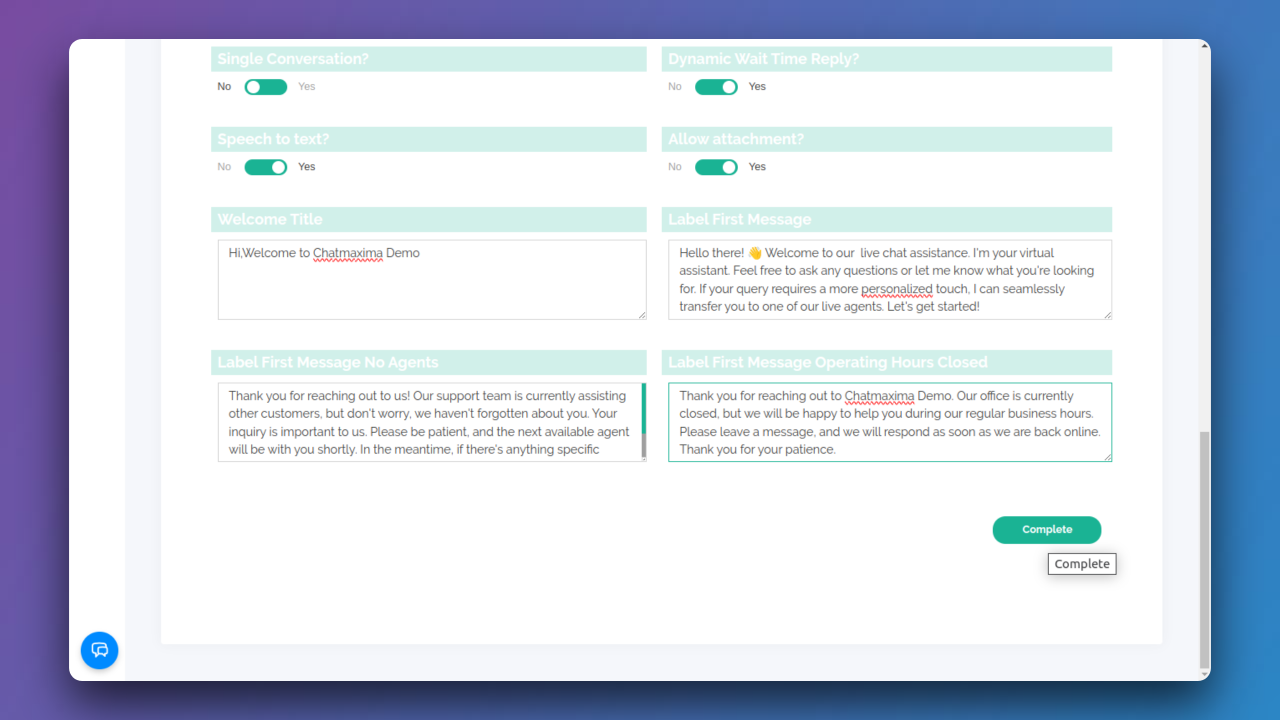
h) Single Conversation
Choose "No" for a Welcome page; otherwise, it redirects directly to the Conversation page.
Decide whether you want to include a Welcome page in your chat flow. Selecting "No" directs users straight to the Conversation page.
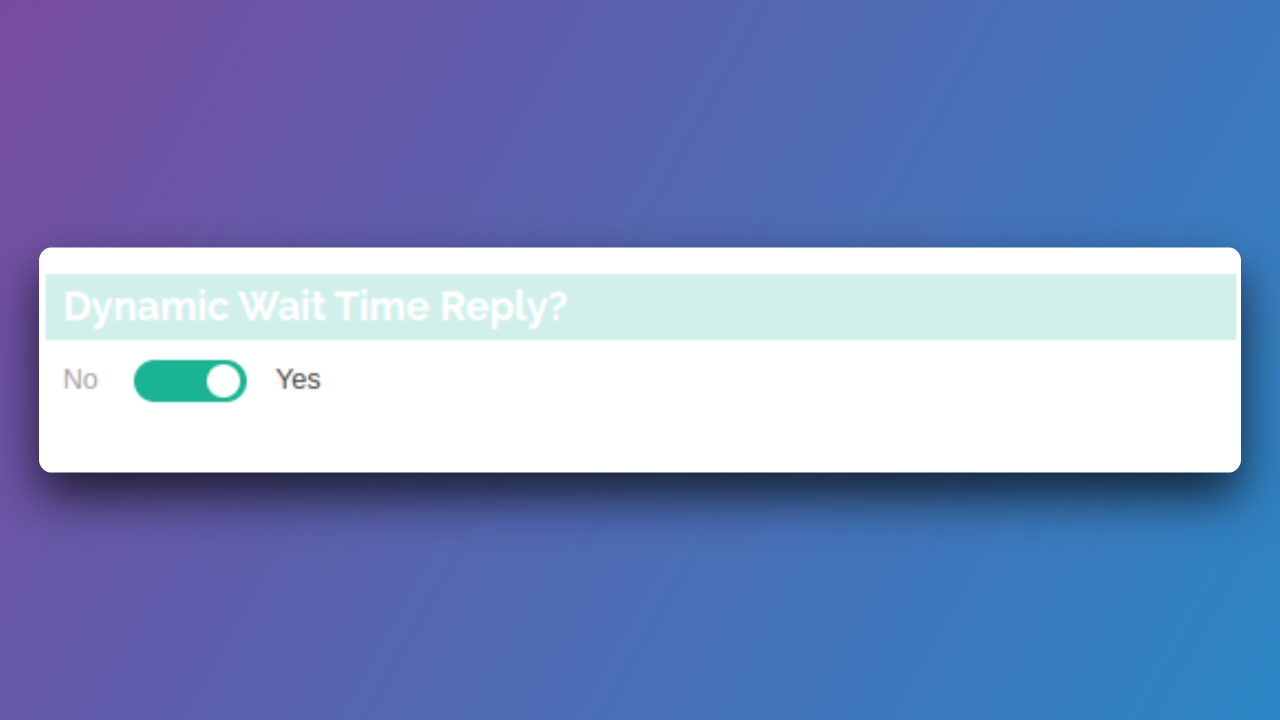
i) Dynamic Wait Time Reply
Specify whether the widget provides dynamic wait time replies.
Optimize user experience by enabling dynamic wait time replies to keep users informed during peak periods.
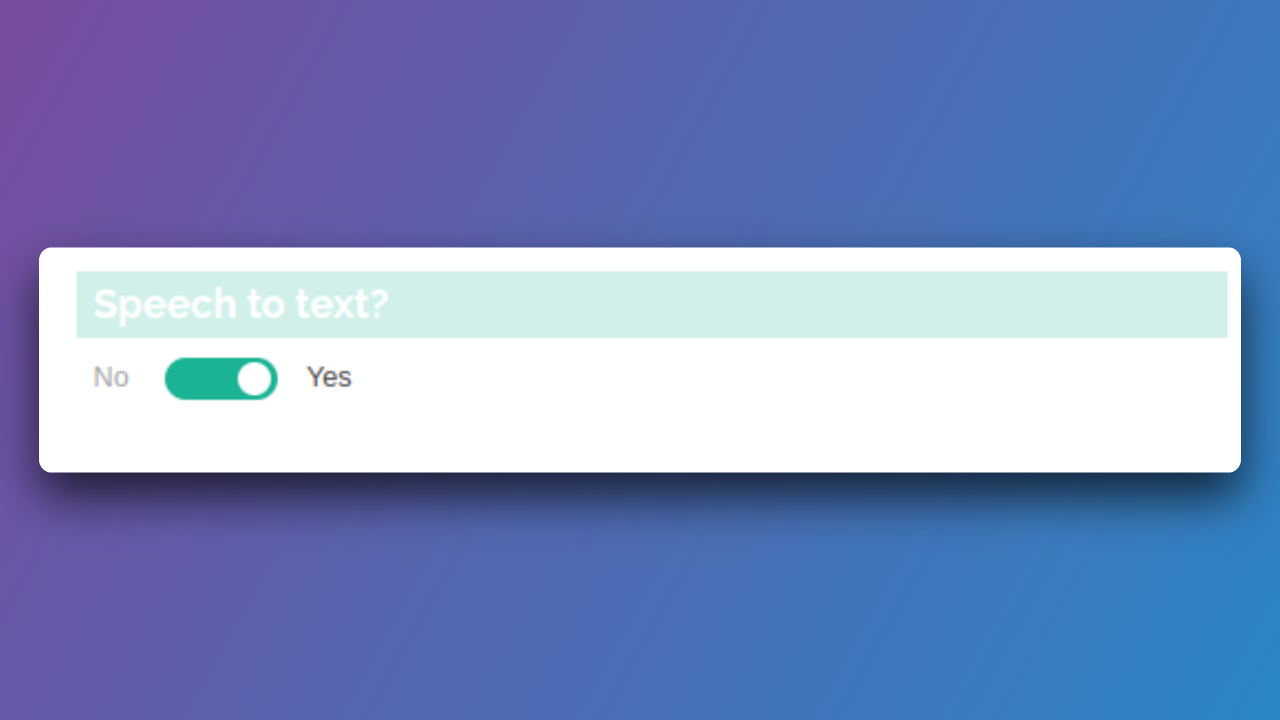
j) Speech to Text
Enable speech-to-text functionality.
Enhance accessibility and convenience by allowing users to convert their spoken words into text.

k) Allow Attachment
Enable/disable file attachment.
Control whether users can attach files during the conversation by toggling this option based on your requirements.

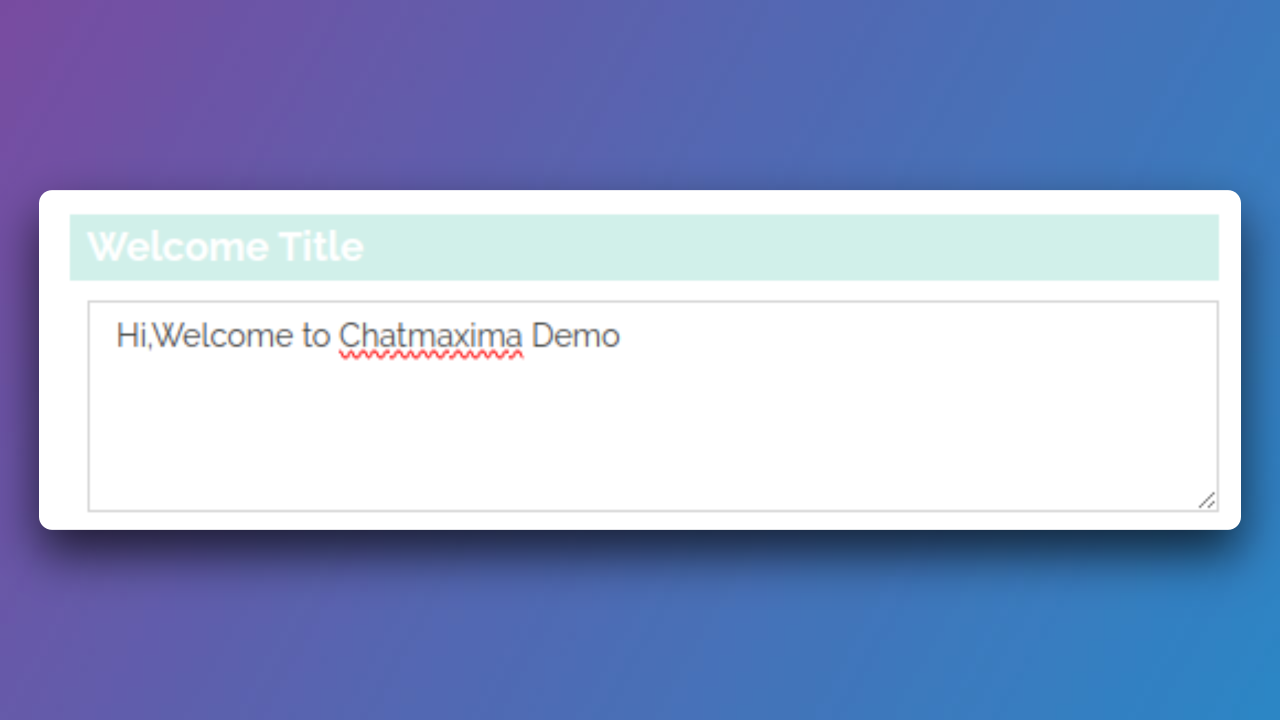
l) Welcome Title
Displayed on the welcome page.
Craft a welcoming title that sets the tone for user engagement on the Welcome page.
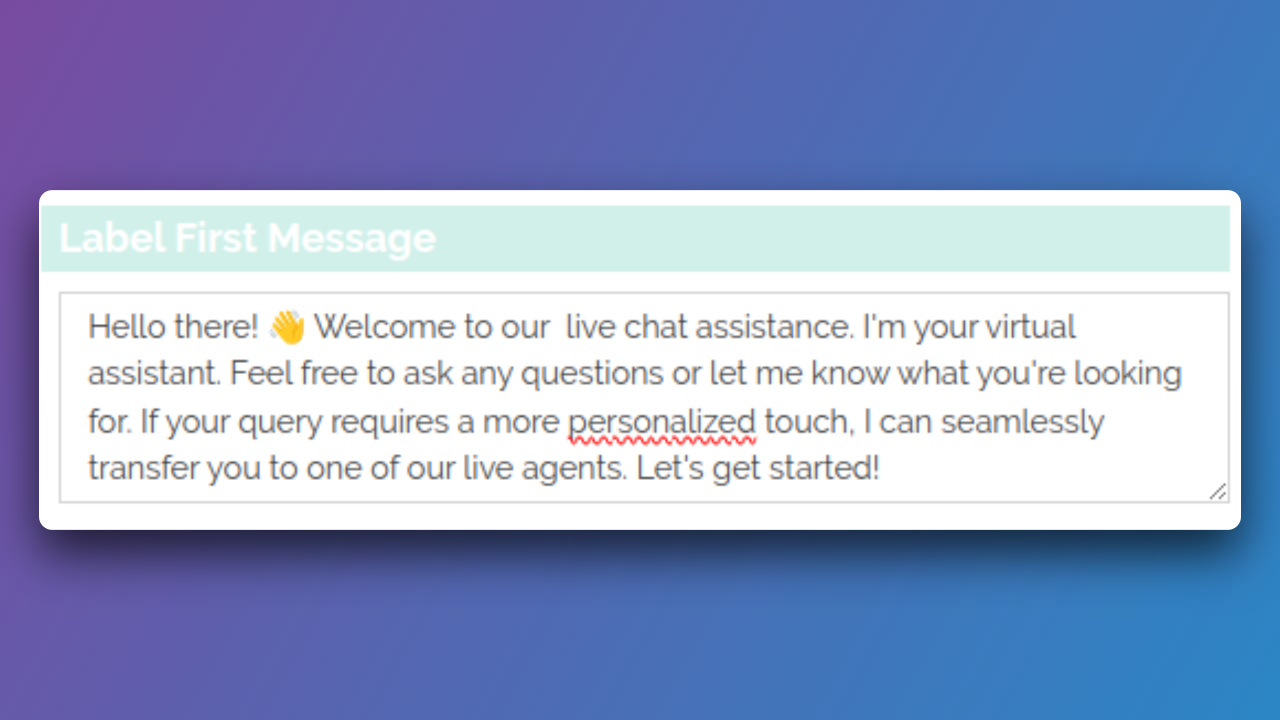
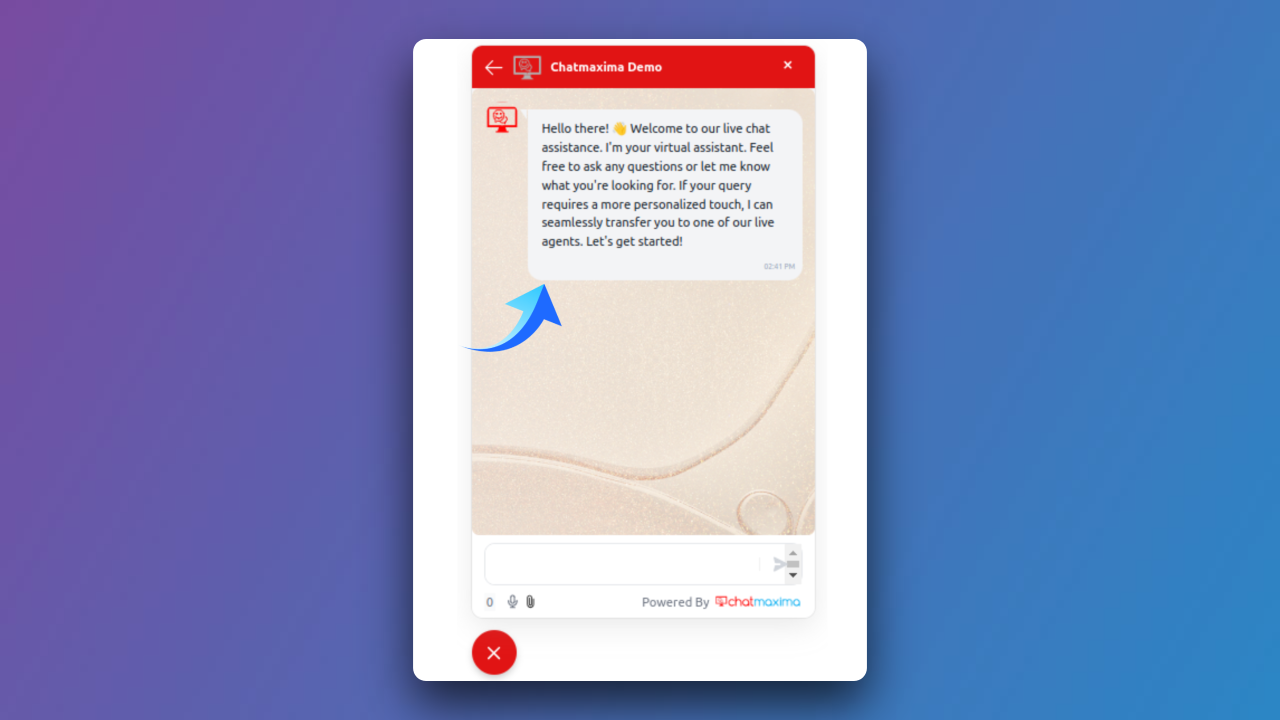
m) Label First Message
Set the first conversation message.
Define the initial message users will see when they open the Conversation page.
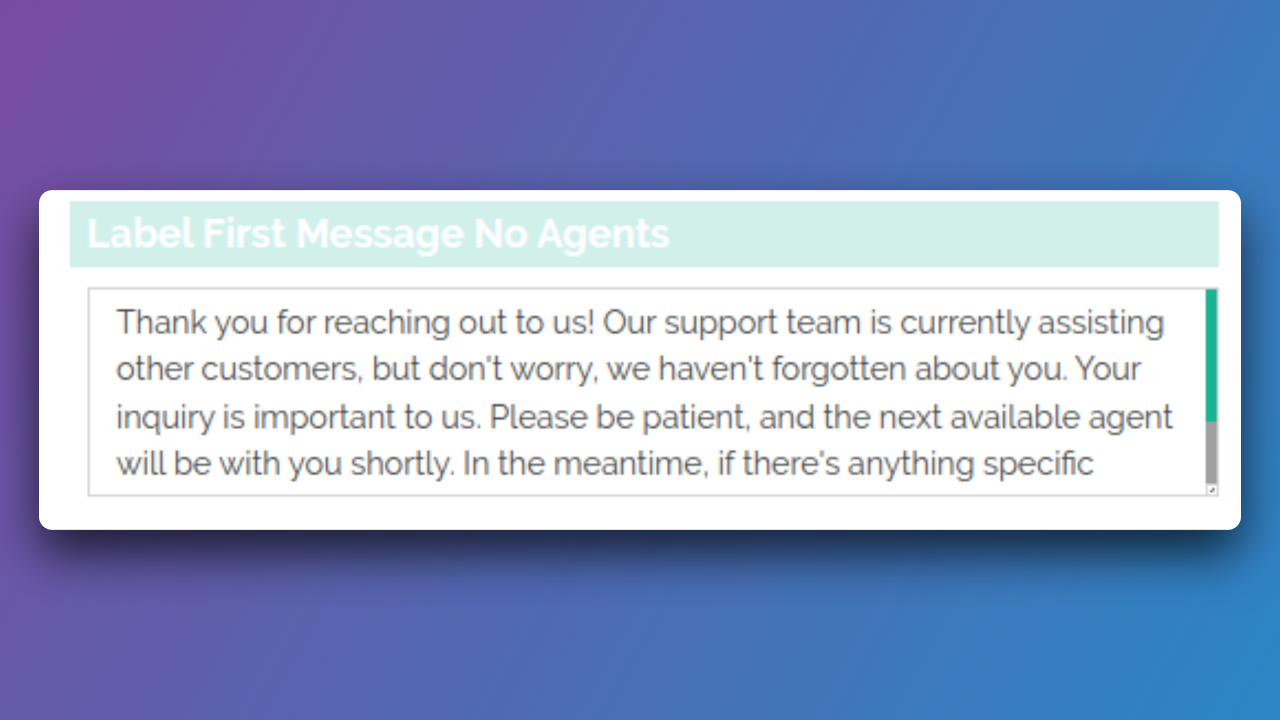
n) Label First Message No Agents
Define the message for user responses with no agent reply.
Create a message specifically for situations where users respond, but no agent reply is available.
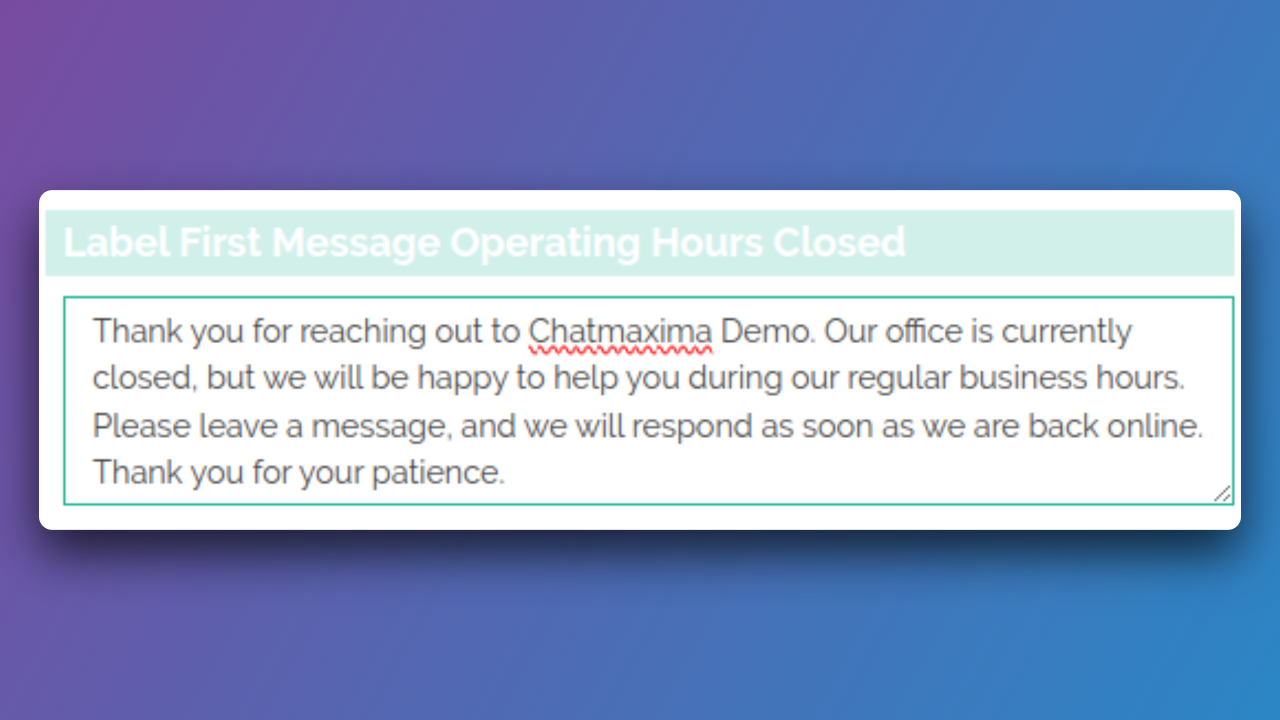
o) Label First Message Operating Hours Closed
Specify the message for holidays or non-operating hours.
Craft a message tailored for instances when agents are unavailable, such as holidays or non-operating hours.
These settings allow you to fully customize the appearance and behavior of your LiveChat widget, providing a tailored experience for your users.
Step 6: Save Your Widget Settings
Click the "Complete" button to successfully update your widget settings.
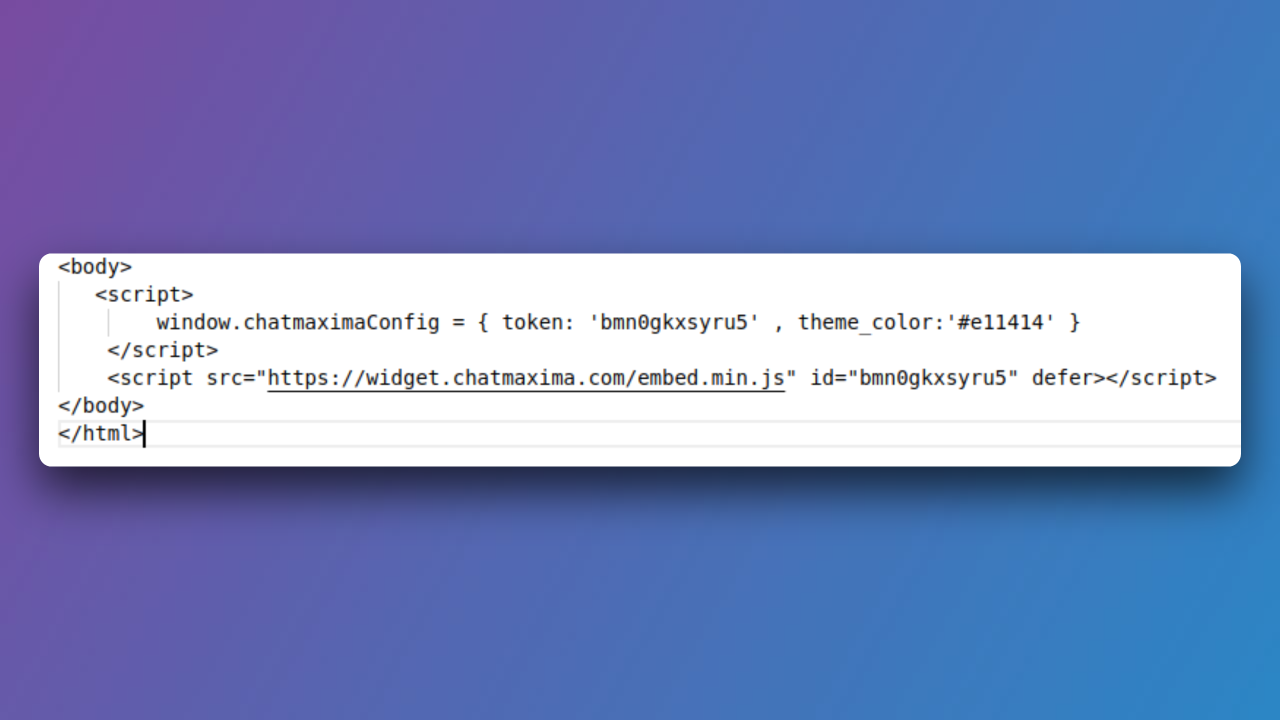
Step 7: Copy Embedding Script
Copy the new script generated and paste it into your website code before the </body> tag at the bottom.
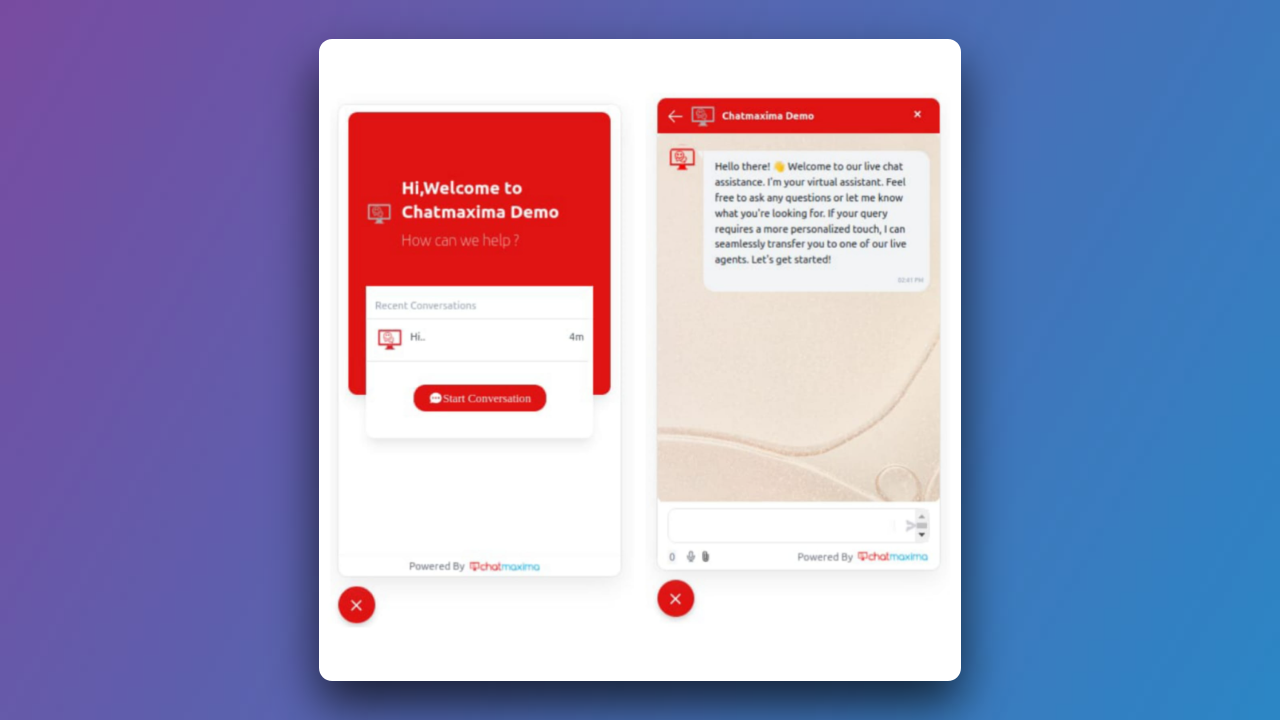
Step 8: Live Chat Widget Activation
Your LiveChat widget is now fully processed and ready for activation.
For more detailed instructions, refer to articles about adding a live chat widget for your WordPress or Shopify platform.
We hope this guide helps you set up your LiveChat widget effortlessly. If you have any questions, feel free to contact our support team at support@chatmaxima.com. Thank you for choosing ChatMaxima!