How to connect your Whatsapp in ChatMaxima?

Welcome to ChatMaxima, where seamless communication meets effortless engagement! This guide walks you through the simple steps of connecting your WhatsApp account to ChatMaxima, unlocking a world of efficient message management and engagement. Whether you're a new user exploring our platform or an existing one seeking enhanced communication channels, our step-by-step instructions ensure a smooth and cost-free integration. Elevate your messaging experience with ChatMaxima and stay connected effortlessly.
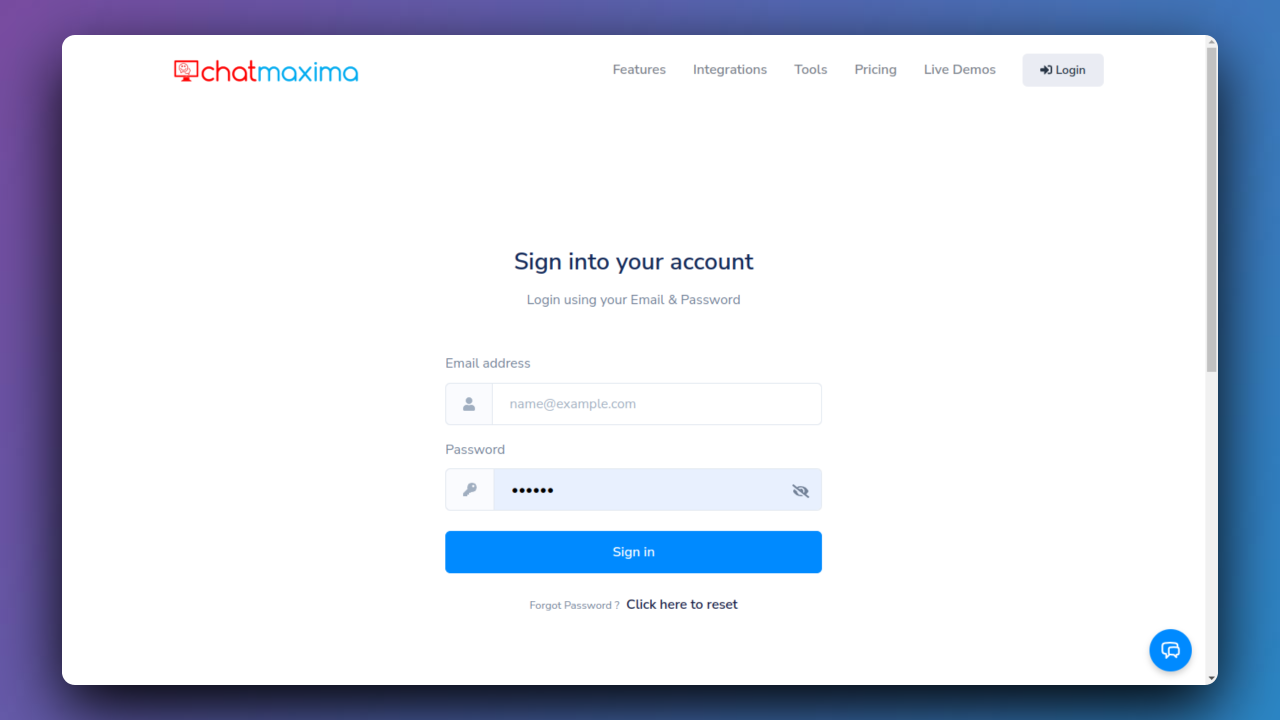
Step 1: Signup for a ChatMaxima Account / Login with your Existing Credentials
To get started, Sign up for a ChatMaxima account and explore the platform with our free subscription. If you're already a user, Log in using your existing credentials. This step unlocks the potential for seamless communication and engagement at no cost with our complimentary subscription.
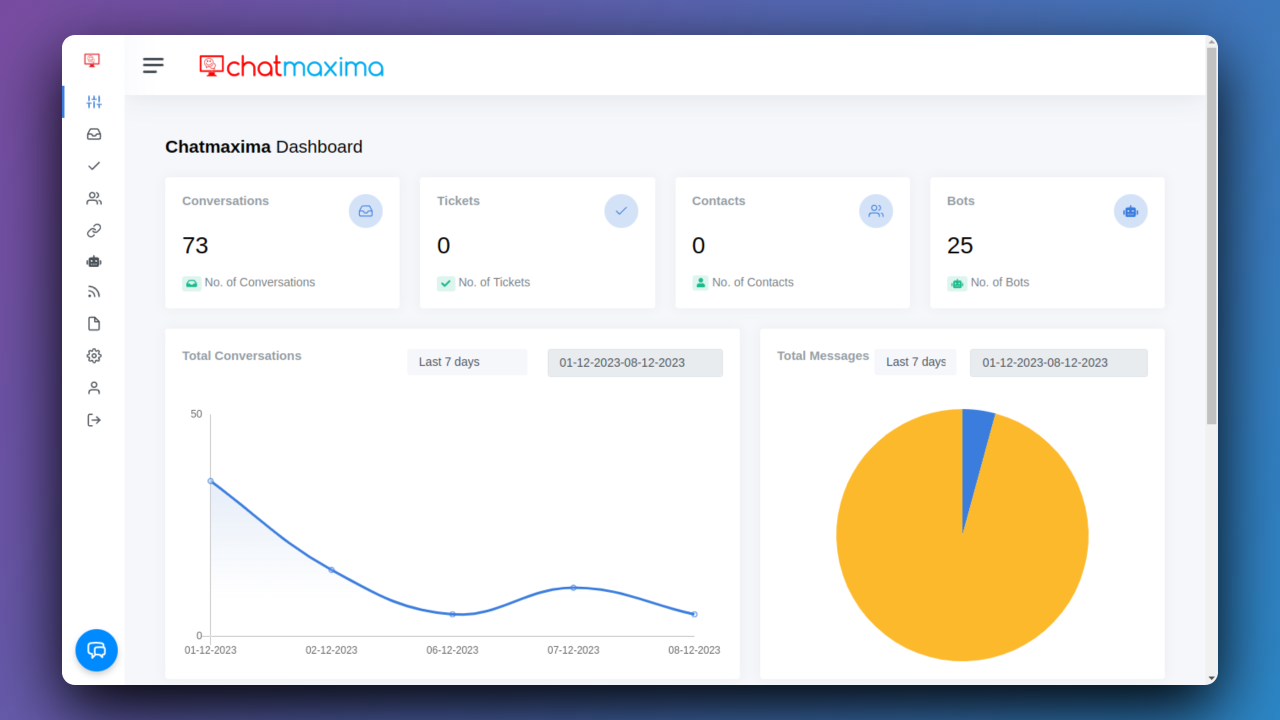
Step 2: Accessing ChatMaxima Dashboard
After login, the ChatMaxima Dashboard opens, providing a central hub for your activities.
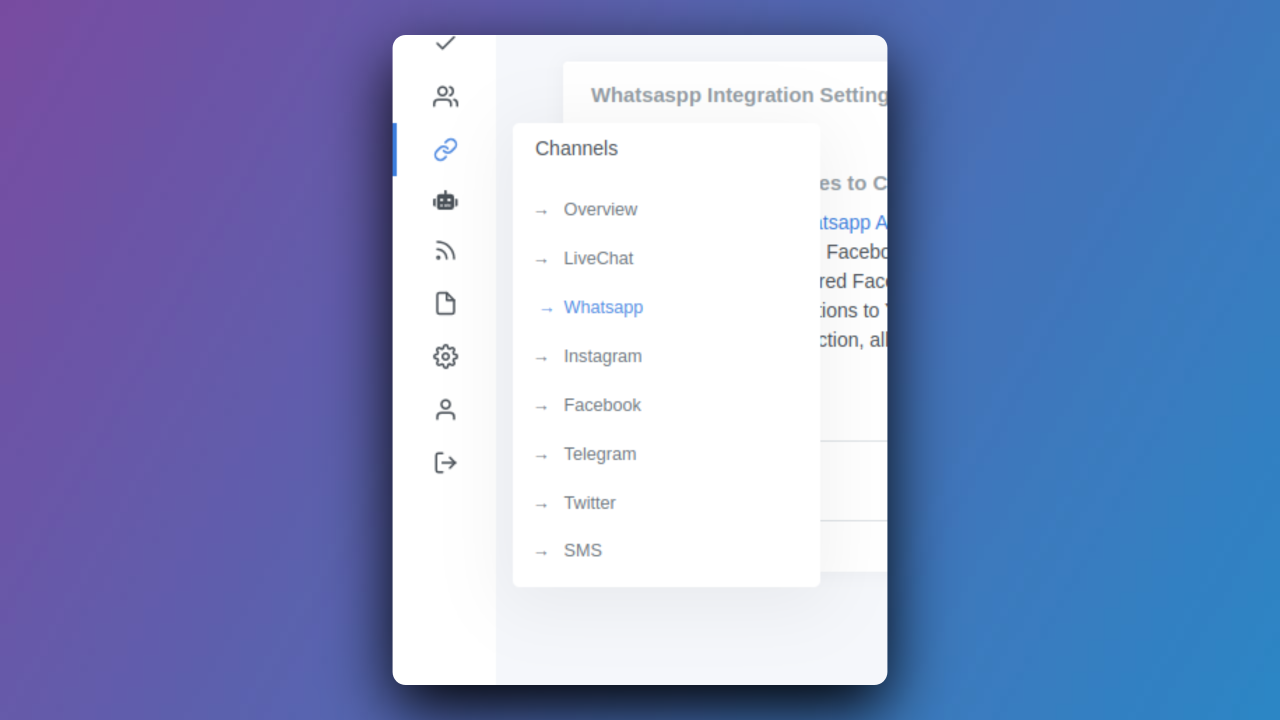
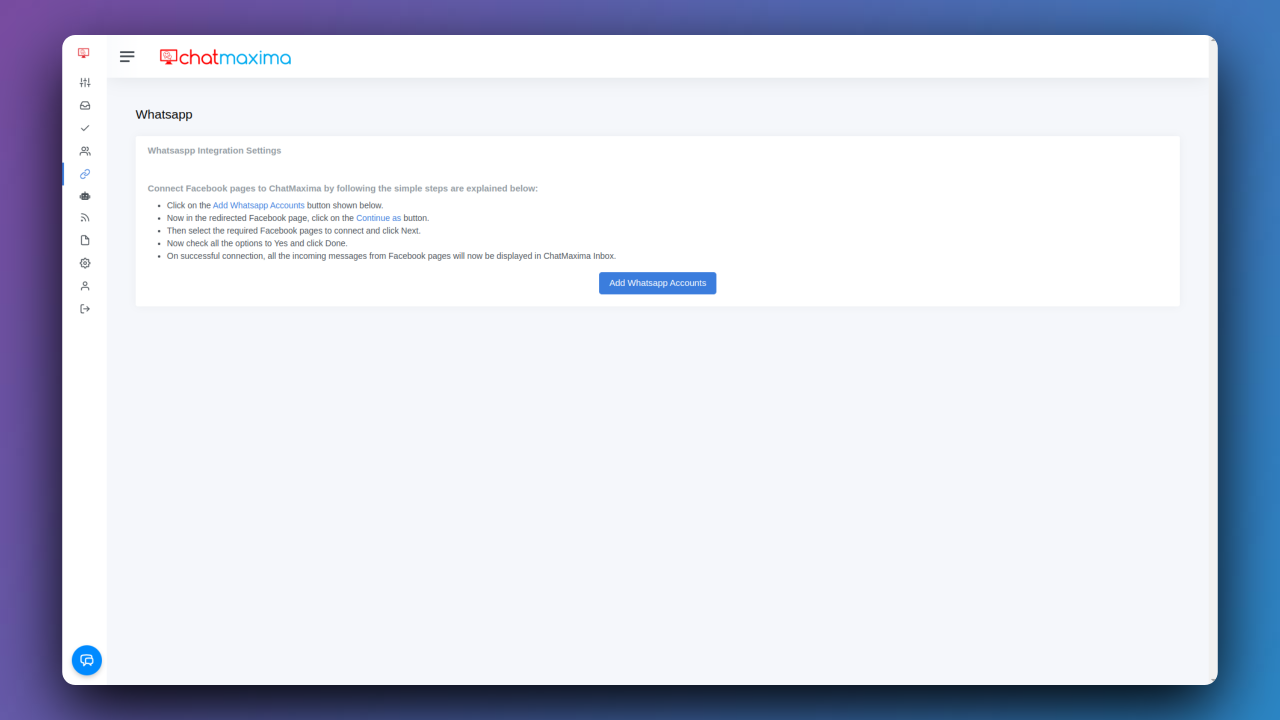
Step 3: Open ChatMaxima WhatsApp Integration
Navigate to the WhatsApp integration section within ChatMaxima to explore powerful communication features.
Step 4: Add WhatsApp Accounts
Initiate WhatsApp integration by clicking on "Add WhatsApp Accounts" for enhanced communication capabilities.
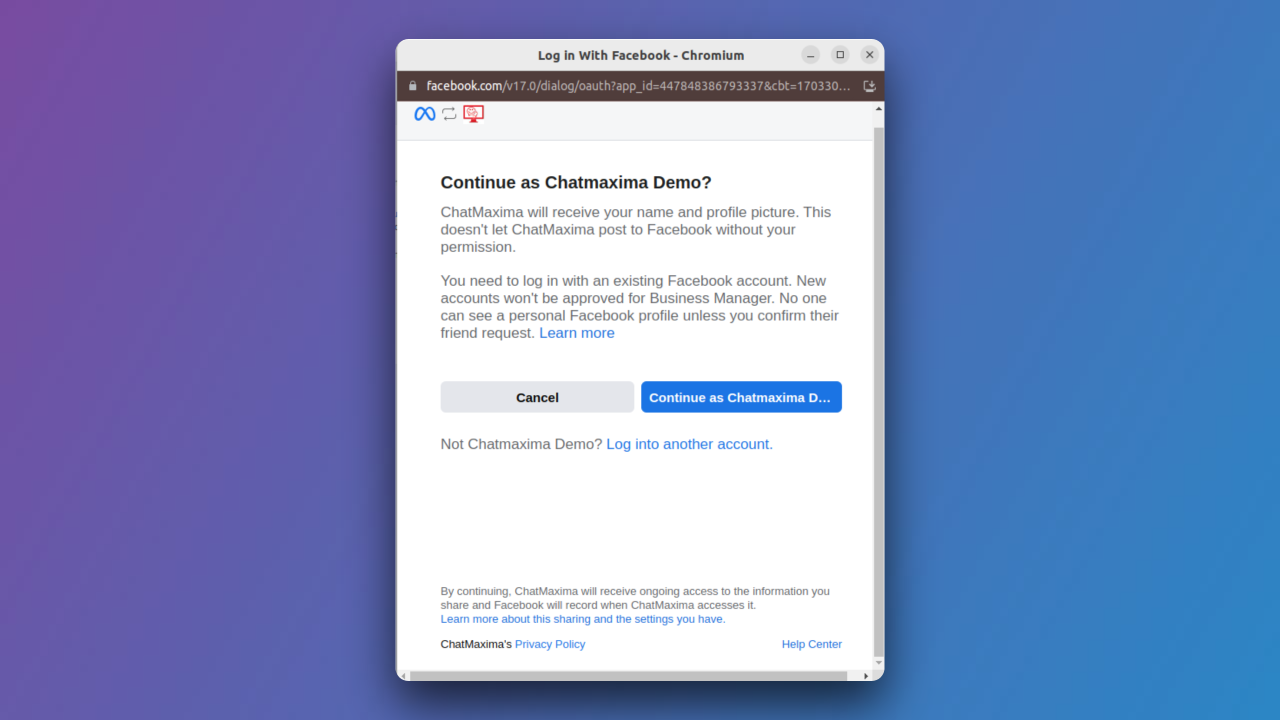
Step 5: Authorize Access on Facebook
In the redirected Facebook page, click "Continue as" to seamlessly authorize access for WhatsApp integration.
Step 6: Connect your account to ChatMaxima
Grant account and billing permissions to ChatMaxima for WhatsApp Business Account management. Click on "Get Started" to proceed.

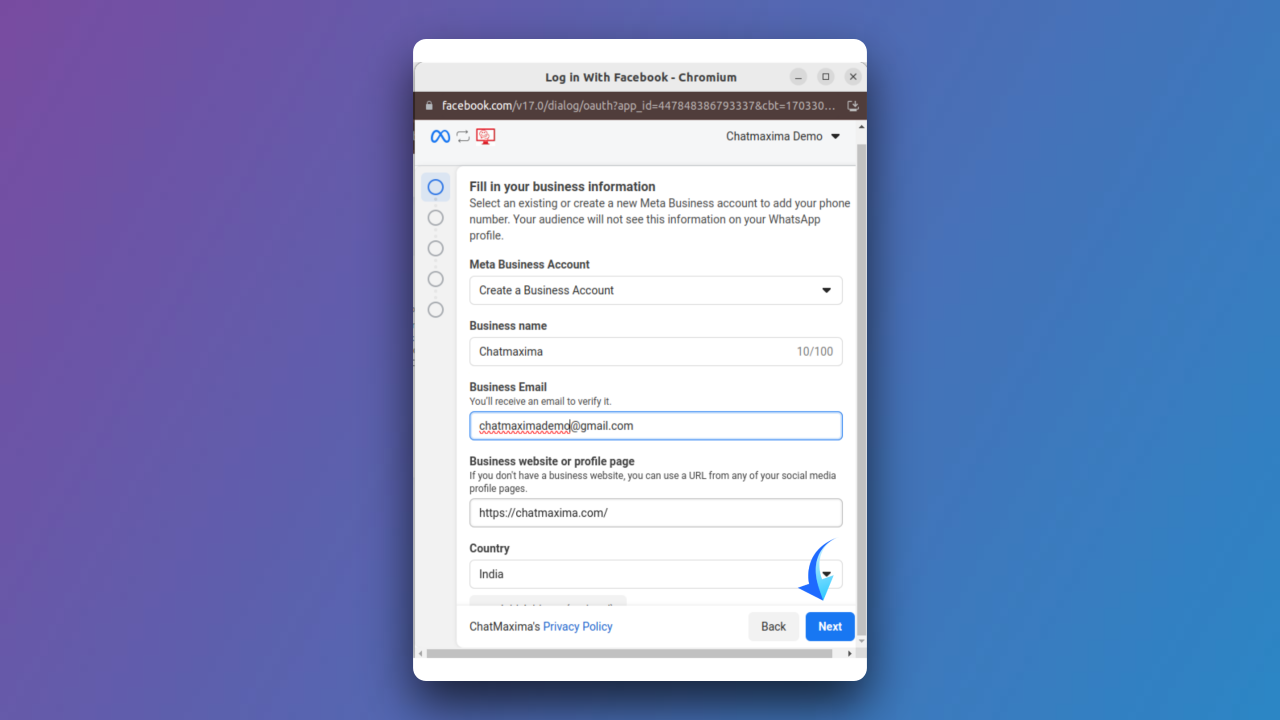
Step 7: Fill in Business Information
Provide essential business details, including Meta Business Account, business name, website, country, and additional address if required.
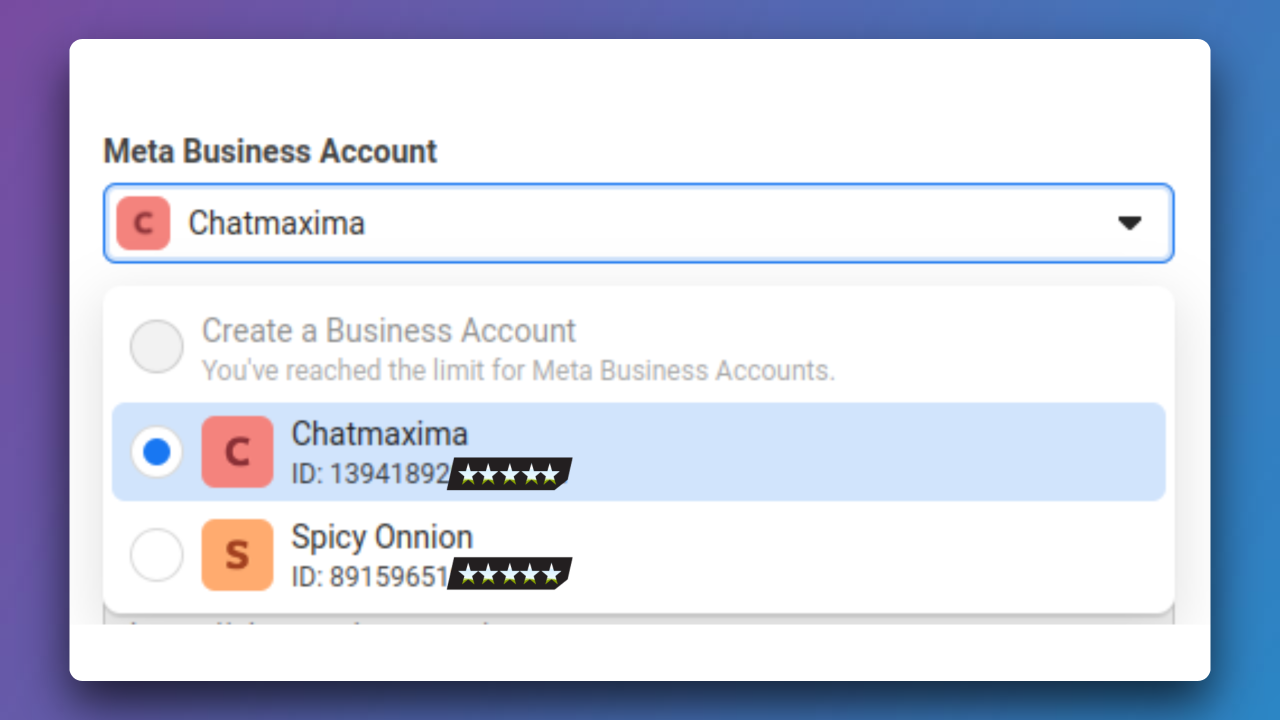
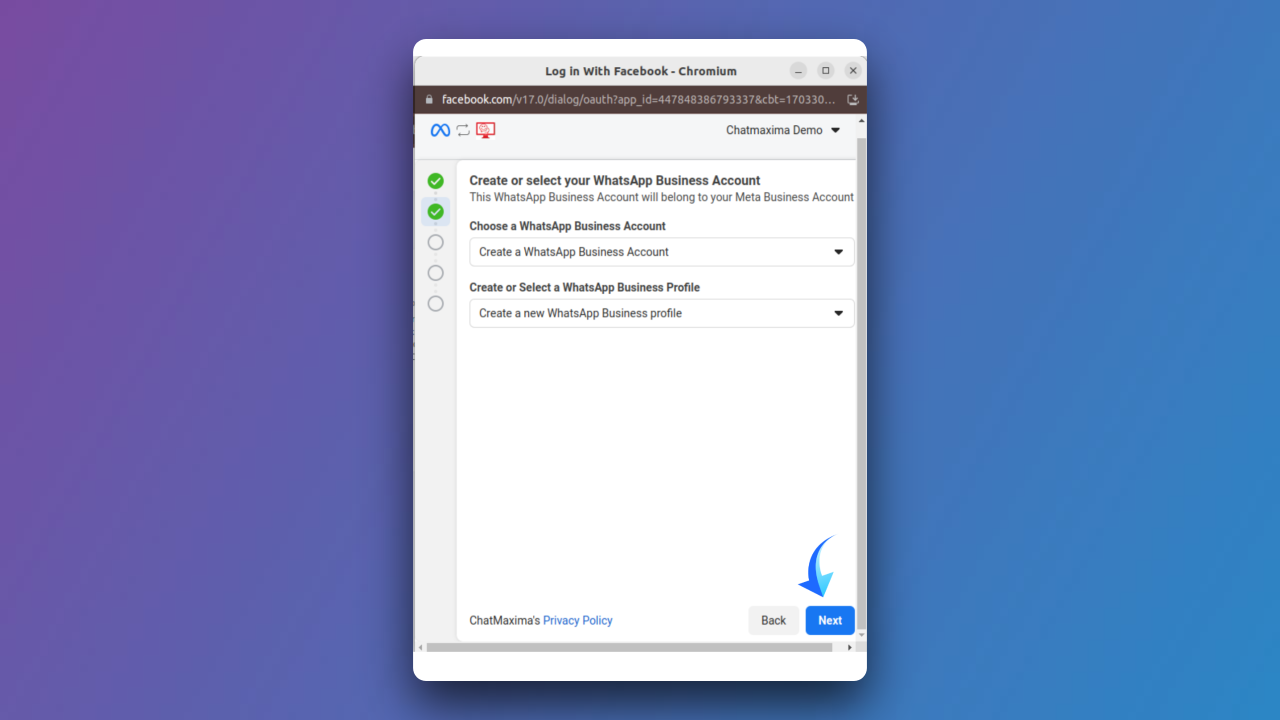
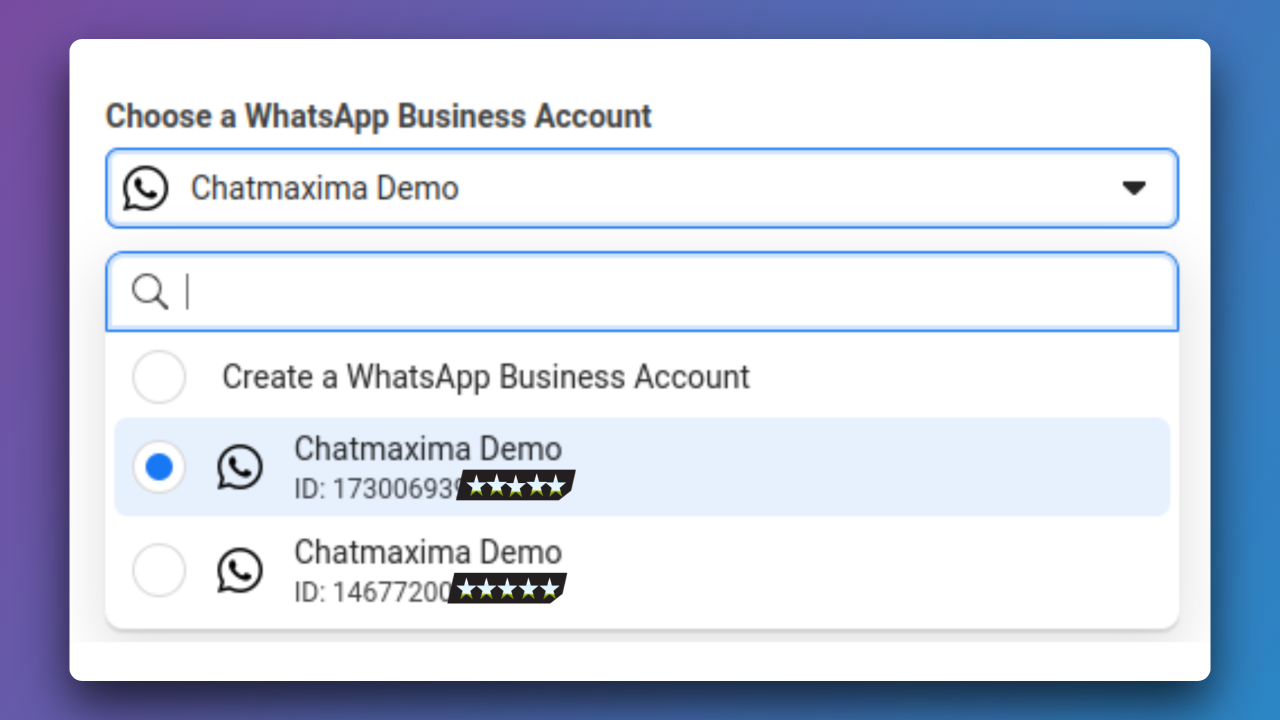
Step 8: Create/Select WhatsApp Business Account
Establish a new WhatsApp Business Account or select an existing one to integrate with ChatMaxima.
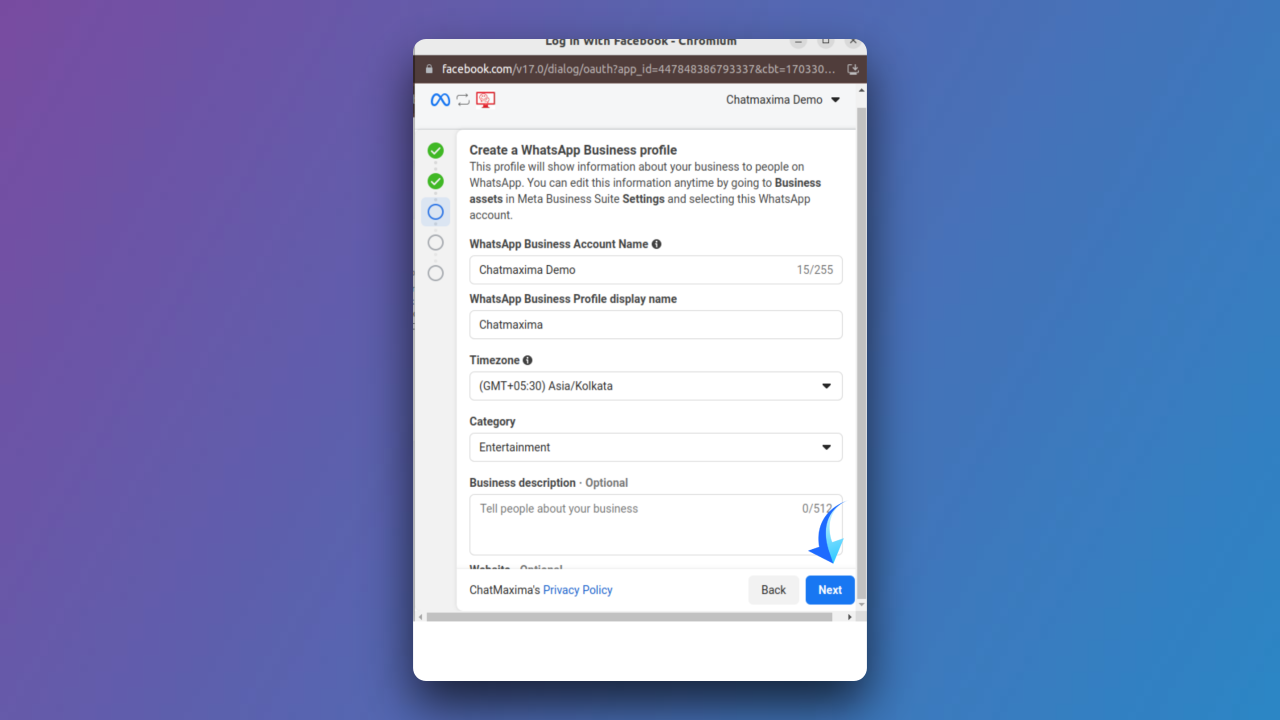
Step 9: Develop WhatsApp Business Profile
Craft a comprehensive WhatsApp Business profile, specifying account name, display name, timezone, category, business description, and optional website.
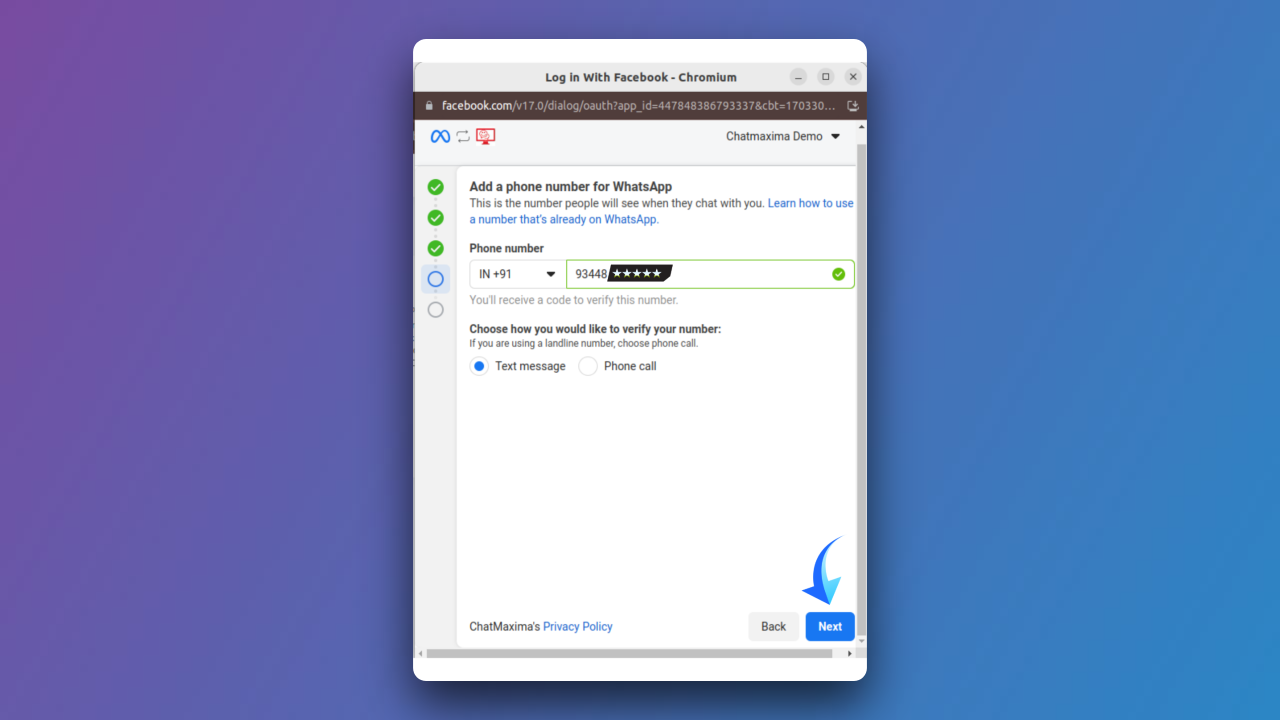
Step 10: Add WhatsApp Phone Number
Include a phone number for WhatsApp, opt for a verification method (text message or phone call), and enter necessary details.
Ensure Non-Registration - Make certain the provided number is not registered to any existing WhatsApp account. Then, select a verification method between Text Message or Phone Call. Click "Next."
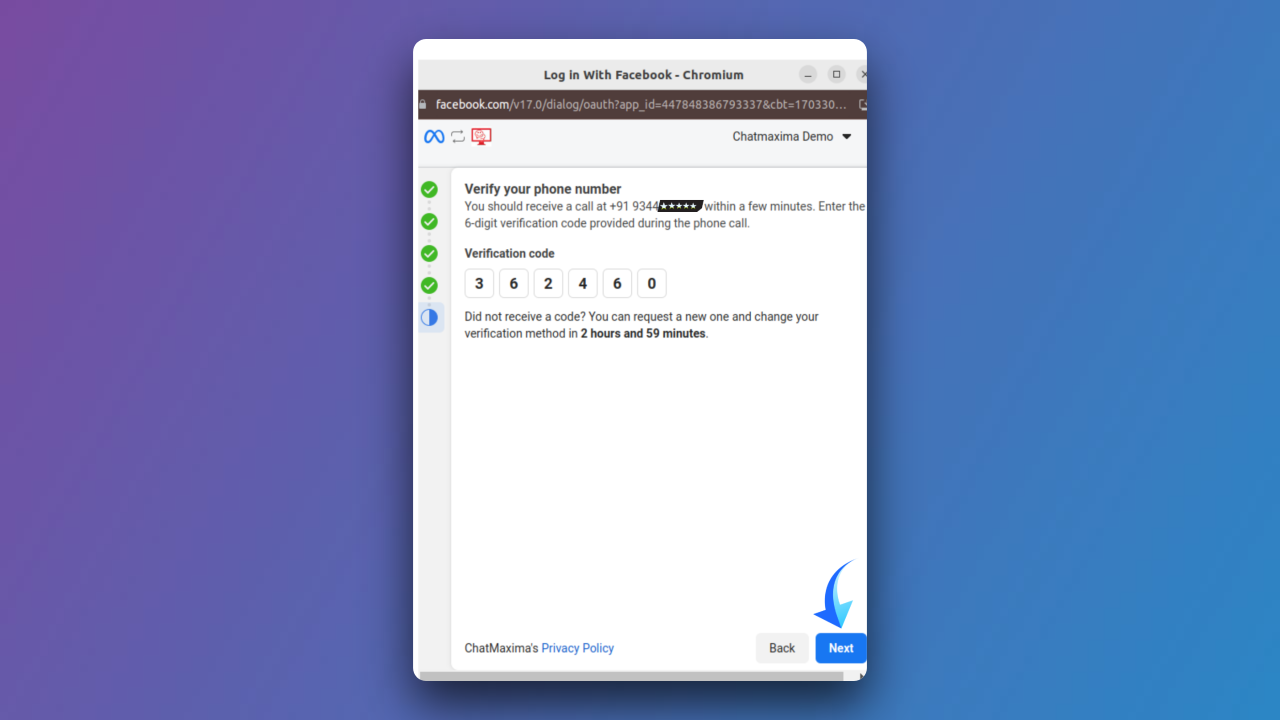
Step 11: Verify Your Phone Number
Enter the 6-digit verification code received via text message or phone call. This step ensures the legitimacy of your WhatsApp phone number.
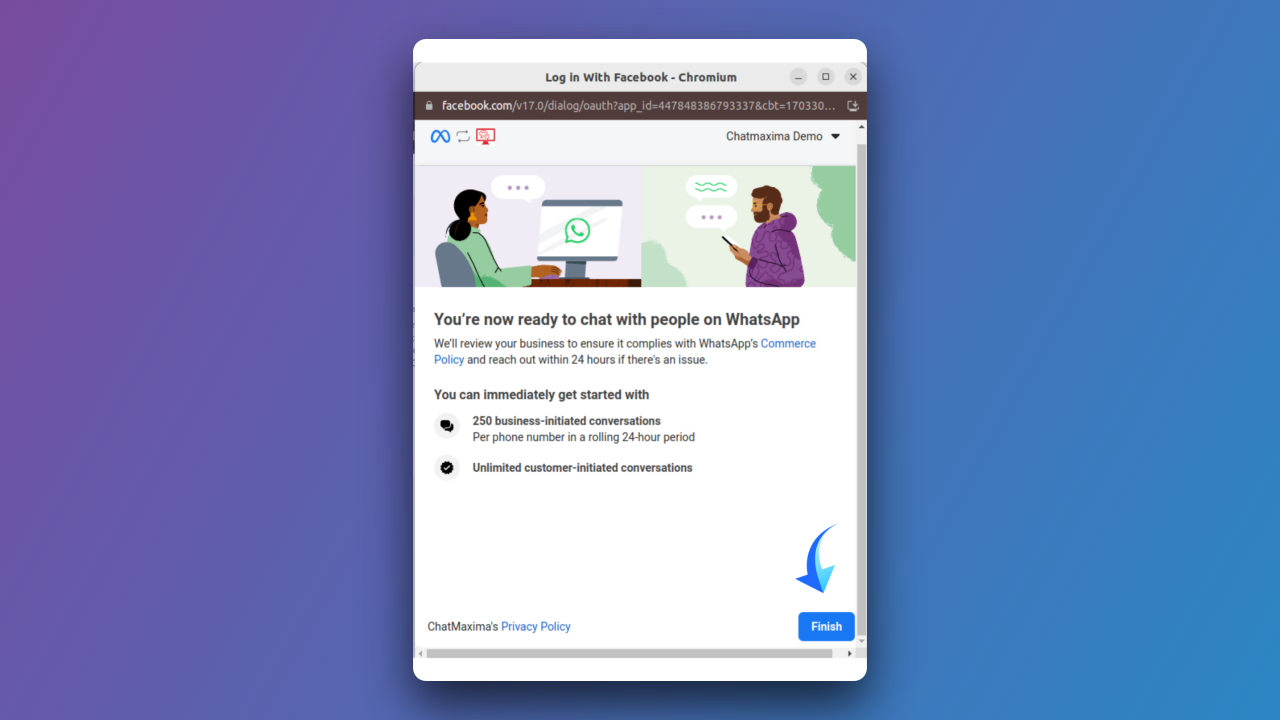
Step 12: Finish the Setup
After successfully verifying your phone number, click "Finish" to conclude the setup process. This finalizes your readiness to engage in WhatsApp conversations through ChatMaxima. Business WhatsApp is successfully verified, enabling its use in ChatMaxima.
Step 13: Add WhatsApp to ChatMaxima
Initiate WhatsApp conversations by clicking "Add" within the ChatMaxima platform. This step seamlessly integrates WhatsApp, allowing you to enjoy enhanced communication capabilities.
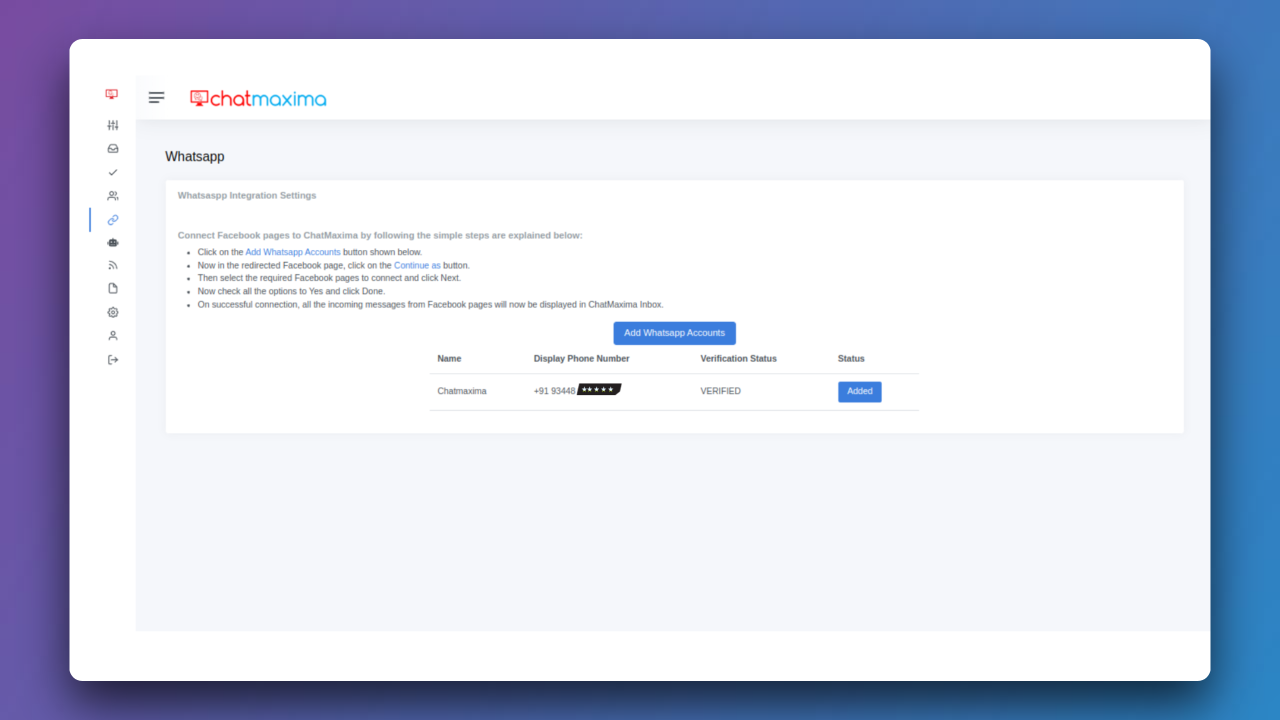
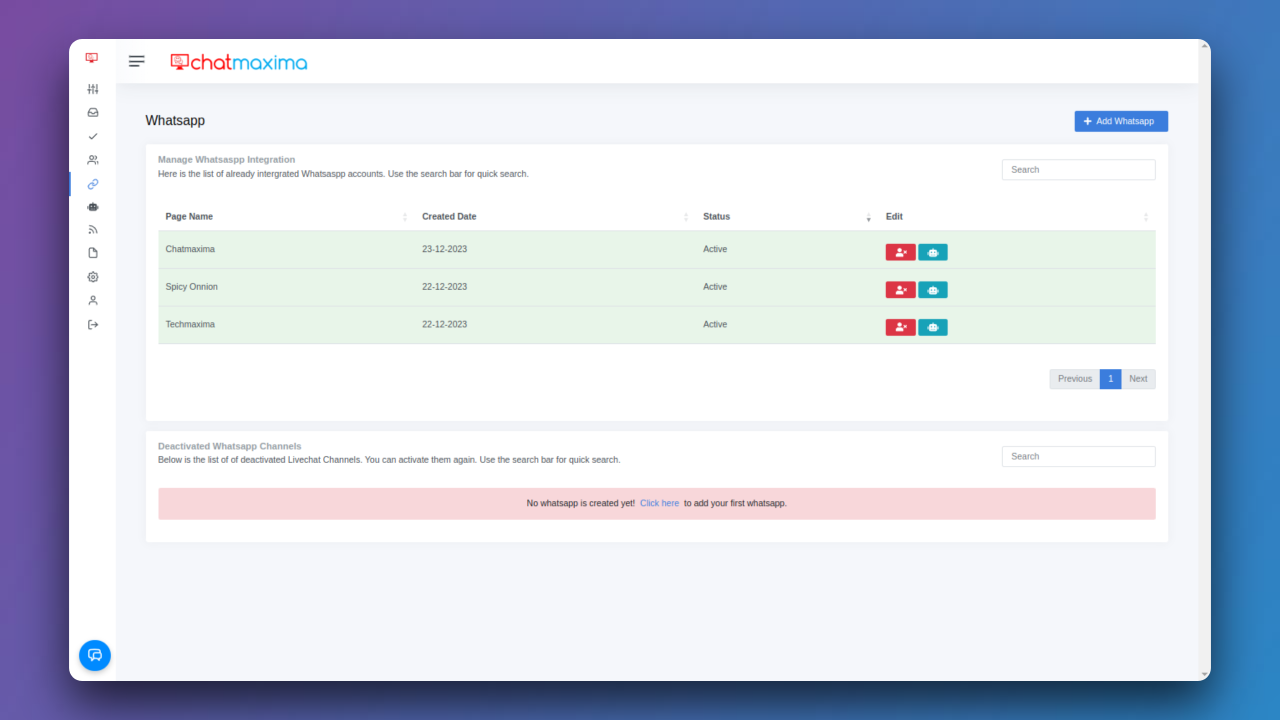
Step 14: Manage WhatsApp Integration
Effortlessly view and manage your WhatsApp integration within the ChatMaxima platform. This central hub provides easy access to your connected WhatsApp accounts for efficient communication and engagement.